What’s an Easter celebration without bunnies and chocolate? We used our Air Fryer to make the most delicious gluten-free mini egg brownies which are rich in flavour.
You will need:
100g dark chocolate 40g butter 175g brown caster sugar 2 eggs 30g cocoa powder 60g gluten-free self-raising flour Kit Kat Bunnies
Melt your dark chocolate before mixing with the butter. Set aside to cool.
In a mixing bowl, mix your sugar and eggs before adding your cooled chocolate and butter mix.
Fold in the flour and cocoa powder before adding crushed mini eggs
Separate your mixture evenly into silicone cupcake cases – this recipe should make approximately 8-10 brownies
Cook for 20 minutes at 160 degrees. Once cooked, place a chocolate bunny in each brownie for an extra chocolate delight!
Easter chocolate leftover? Try our Mini Egg & Creme Egg Cookies, cooked in our Dual Glass Drawer Air Fryer! These cookies take a few minutes to prepare, and only 12 minutes to cook, making them a quick and easy recipe for all to enjoy.
Ingredients Makes about 1⅓ cups ½ cup fresh lemon juice 2 teaspoons finely grated fresh lemon zest ½ cup sugar 3 large eggs ¾ stick (6 tablespoons) unsalted butter, cut into bits
Step 1 – Whisk together juice, zest, sugar, and eggs in a 2-quart heavy saucepan. Stir in butter and cook over moderately low heat, whisking frequently, until curd is thick enough to hold marks of whisk and first bubble appears on surface, about 6 minutes. Step 2 – Transfer lemon curd to a bowl and chill, its surface covered with plastic wrap, until cold, at least 1 hour. Note*Curd can be chilled up to 1 week.
Bake a plant-based version of a chocolate fudge cake for a birthday party. Everyone can enjoy it, including guests who have a dairy intolerance or egg allergies
Ingredients
320ml sunflower oil , plus extra for the tins
450ml soy , almond or coconut milk (the pouring variety, not a can)
1 tbsp apple cider vinegar
500g light muscovado sugar
2 tsp vanilla extract or vanilla bean paste
260g plain soy or coconut yogurt
450g self-raising flour
160g cocoa powder
1½ tsp baking powder
1½ tsp bicarbonate of soda
For the vegan buttercream
200g dairy-free dark chocolate
400g vegan spread , at room temperature
2 tsp vanilla extract or vanilla bean paste
800g icing sugar , sifted
colourful sprinkles (make sure they are suitable for vegans)
Method
STEP 1– Heat the oven to 180C/160C fan/gas 4. Oil three 20cm round cake tins and line the bases and sides with baking parchment (if you don’t have three tins, cook the batter in batches). Whisk the milk and vinegar together in a jug – the milk should curdle slightly. Set aside.
STEP 2– Whisk the sugar, oil and vanilla extract together in a bowl, then whisk in the yogurt, making sure to break down any sugar lumps. Pour in the soured milk and mix well.
STEP 3– Sift the flour, cocoa powder, baking powder, bicarbonate of soda and ½ tsp salt into a separate bowl and stir well to combine. Gradually whisk the wet ingredients into the dry until you have a smooth batter, but be careful not to over-mix.
STEP 4– Divide the batter evenly between the tins and bake for 25-30 mins, until well risen and springy, and a skewer inserted into the centre comes out almost clean. A few sticky crumbs are fine, but the mixture should not be wet.
STEP 5– Leave the cakes to cool in their tins for 20 mins, then carefully turn them out onto a wire rack to cool completely. They will be delicate so be gentle (a cake lifter is helpful). The sponges will keep, covered, at room temperature for up to two days.
STEP 6– For the vegan buttercream, melt the chocolate in the microwave a bowl set over a pan of simmering water. Leave to cool. Beat the spread and vanilla on high speed in a Cooks Professional Stand Mixer or a few minutes until pale and fluffy. Add the icing sugar gradually, beating on slow to start with, then turning up the speed to max until the mixture is light and creamy. Pour in the cooled chocolate and combine thoroughly. Chill the buttercream for at least 30 mins before using.
STEP 7– To assemble the cake, first use a sharp knife to trim the tops off the sponges to make them level. Put one of the sponges on a serving plate, cake stand or 20cm round cake drum (using a cake drum makes it easier to ice the cake neatly and to move it onto a stand or plate later). Spread over a layer of the buttercream, using a palette knife to get an even, neat finish. Top with the second sponge and spread over another layer of buttercream.
STEP 8– Top with the last sponge upside-down, so the bottom of the cake becomes the top (this will help to keep the icing neat and relatively crumb-free). Spread the sides of the cake with buttercream. Hold the top sponge steady with a palm if you need to stabilise the cake. Once you have the sides covered as neatly as you can, cover the top with a thin layer of buttercream. Use your palette knife to neaten the top and sides. If you have a side scraper, use it to sweep around the sides and top to sharpen the coating. (This is a crumb coat, trapping any crumbs to give you a neat, firm base.) Put the cake in the fridge to firm up and chill for 1-2 hrs.
STEP 9– To finish, cover the sides and top of the cake in the same manner, using most of the remaining buttercream. Press the sprinkles up against the bottom of the cake, about a quarter to a third of the way up. You can dress the top of the cake with a circle of sprinkles, or for a fancier finish, pipe little swirls around the top edge of the cake using any remaining buttercream scraped into a piping bag fitted with a large open star nozzle, then finish with more sprinkles.
STEP 10– Keep the cake in the fridge to stay firm, then remove 1 hr before serving. Will keep, covered, in the fridge, for up to three days.
Heat the oven to 190°C/170°C fan/gas 5. In a Cooks Professional 1000W stand mixer with the paddle attachment, cream the butter and sugar together until pale and fluffy. Add the egg and vanilla, then beat until well combined.
Sift over the flour, baking powder and salt, then beat again briefly to combine. Stir in the chocolate chips using a wooden spoon or spatula, then spoon the dough into a Cooks Professional Cast iron pan and press down gently to flatten and spread evenly to the edges. Bake for 25-30 minutes until risen and golden. Top with scoops of ice cream, then dig straight in with your spoons!
Ingredients: 4 apples 25g butter 2 tbsp brown sugar 50g fresh breadcrumbs 40g mixed seeds Zest of 1 orange 1 tsp cinnamon or mixed spice
Method 1.Core the apples and score the skin around the circumference with a sharp knife to stop them from splitting. 2.Combine all the remaining ingredients and carefully stuff the apple cores, scattering any remaining mix over the apples. Place them in the base of the air fryer. 3.Select the bake function (180°C – 15 minutes), cook for the duration of the program or they are slightly collapsed
Makes 10-12 slices Crust: 1/3 cup butter (about 3 oz) 2 cups rolled oats 1/2 cup muscovado sugar
Filling 1 lb yogurt cheese (please see note) 1 lb mascarpone cheese 2 tbsp honey 3 eggs 1 egg yolk 1 lb good quality white chocolate 1 tbsp pure vanilla extract
To serve: 1 ½ lbs fresh strawberries 2-3 tbsp granulated sugar/natural cane sugar 1 tbsp lemon juice
Preheat the oven to 350 Fahrenheit (180 Celsius).
To prepare the pan, wrap the bottom and sides of the pan with aluminum foil, shiny side out. Coat the inside with vegetable oil spray. For ease of serving, invert the bottom of the pan, so the lip around the edge faces downward, and lock in place. Select a roasting pan large enough to accommodate the pan and place a paper towel in it. Bring a kettle of water to boil. Set aside.
To prepare the crust, cut the butter into smaller pieces and melt over low heat. Let it cool slightly. In a medium bowl, combine the oats and the sugar. Add the cooled melted butter and mix to combine. Transfer the mixture onto the prepared pan and with your hands spread the mixture to cover the base and sides of the pan. Bake in the oven for 10 minutes until light golden. Remove from the oven and allow to cool.
Reduce the oven temperature to 300 Fahrenheit (150 Celsius).
To melt the white chocolate, bring a pot of water, about 1/3 high, to a boil and lower the heat. Chop or shave the white chocolate and transfer to a bowl. Place the bowl over the bain marie and allow the white chocolate to melt, stirring once. When melted, remove from the heat and stir with a rubber spatula. Set aside.
To prepare the filling, make sure the cheeses are at room temperature. Beat together the yogurt and mascarpone cheese and honey on low speed until just until incorporated and smooth in your Cooks Professonal 1200W Stabnd Mixer. Scrape the bowl down to ensure everything is combined. On low speed, beat in eggs and egg yolk one at a time. Don’t over mix. Add the melted white chocolate and vanilla and mix on low speed until combined. Pour into the baked crust and place in a prepared pan.
To bake the cheesecake, pour the hot water from the kettle into the roasting pan to reach halfway up the sides of the spring form pan. Bake for 1 hour to 1 hour and 10 minutes or until the cheesecake is golden brown on top but still loose in the center. Remove the roasting pan from the oven. Then, carefully transfer the cheesecake to a cooling rack and remove the foil. Then run a knife around the edges to loosen the cake from the pan. Let stand for 30 minutes. Refrigerate the cheesecake on the rack until the center is very cold, at least 8 hours, or up to 24 hours. To prepare the strawberries, wash and dry the strawberries, then core and cut them into quarters. Place half of the strawberries in a blender with half of the sugar and lemon juice and blend until smooth. Add more sugar if necessary. Strain the coulis through a fine-mesh strainer into a bowl. Use the back of a small ladle to push the coulis through. Discard the seeds. Transfer to a bowl.
To serve the cheesecake, remove the side of the spring form pan. To cut the cake, dip a sharp knife into a glass of hot water. Shake off the water, away from the cake, and slice. Wipe the blade clean on a paper towel. Dip the knife again into the hot water and make the second cut. Continue the process as you make each cut. Serve the cheesecake with the fresh strawberries and the coulis.
Notes: To make the yogurt cheese: Line a strainer over a bowl with cheesecloth and add the yogurt. Allow the whey to drain for about 7-8 hours. Make sure that the yogurt cheese is not too dry.
Running the knife around the edge after baking will prevent the cheesecake from cracking at the top.
While using the mixer makes your life easier, you can beat the filing by hand.
Try not to overbeat or over mix the filling most especially after adding the eggs. It will cause the cake to rise and fall, which can cause the top of the cake to crack. The less volume you produce, the less the cake will rise.
Dark chocolate and sumptuous ginger combine to create the perfect tea time treat.
Ingredients
225g plain flour
220ml milk
115g dark brown sugar
85g butter, melted and cooled, plus extra for greasing
55g cocoa powder
2 eggs
3 pieces stem ginger in syrup, finely chopped, play 2 tbsp syrup from the jar
1 tbsp ground ginger
1 tbsp baking powder
Pinch of salt
Method
Preheat your oven to 200℃/180℃ fan/gas mark 6. Grease a 12 hole muffin tray with the extra butter. In a large mixing bowl, sift together the plain flour, cocoa powder, ground ginger, baking powder, and salt. Stir in the finely chopped stem ginger and the sugar.
Beat together the eggs in a large jug, then beat in the milk, ginger syrup, and melted butter. Make a well in the centre of your dry ingredients, and pour in the liquid ingredients; mix gently together until combined, but be careful not to overmix.
Spoon the muffin mixture into the prepared muffin tin and cook for 20 minutes of until the muffins are well risen and firm to the touch. Allow to cool in the tin for 5 minutes before turning out onto a wire rack to cool completely. Serve with your favourite hot drink for a scrumptious afternoon treat!
1.For the waffles, preheat a Cooks Professional Luxury Rotary Waffle Maker to a medium setting and preheat the oven to 140C/275F/Gas 1. Place a large wire rack onto a baking tray and keep it warm.
2.Mix the flour, baking powder, salt and granulated sugar in a large mixing bowl. Whisk in the eggs, milk and butter until well combined.
3.Ladle some of the batter into each well of the waffle maker, close the lid and cook for five minutes, or until golden-brown and crisp. Repeat the process until the batter is used up. Keep the waffles warm on the baking tray in the oven.
4.For the hot chocolate sauce, melt the chocolate in a bowl set over a pan of simmering water (ensure the bottom of the bowl does not touch the water).
5.In another pan, heat the sugar and 100ml/3½oz water, stirring until the sugar dissolves. Bring to the boil.
6.Stir the sugar syrup into the chocolate until smooth and shiny.
7.For the fried bananas, heat a frying pan until hot, then melt together the butter and sugar.
8.Add the bananas and fry for 1-2 minutes on each side, or until golden-brown all over.
9.Place the waffles on a plate and top with chocolate sauce and serve the bananas and ice cream on the side.
A truly decadent dessert, this fruity mango and passionfruit meringue roulade will wow your family and friends.
Ingredients
175g caster sugar
600ml double cream
400g passionfruit curd
3 large egg whites
1 level tsp cornflour
1 tsp malt vinegar
1 tsp vanilla extract
1 large mango, peeled, stoned, and diced, or 425g tinned mango, diced
2 passion fruits
Icing sugar, to dust
Method
Preheat your oven to 150℃/130℃ fan/gas mark 2. Line a 33 x 23cm swiss roll tin with greaseproof paper. In your Cooks Professional stand mixer, whisk the egg whites until frothy and they’ve doubled in bulk. Gradually whisk in the caster sugar, a spoonful at a time, until the mixture is thick and shiny. In a bowl, combine the cornflour, vanilla extract, and vinegar, then whisk into the egg whites.
Once the meringue mixture is ready, carefully spoon it into the prepared tin. Take care when levelling the surface, and try to keep as much of the air whisked into the eggs as possible. Bake meringue in the oven for 30 minutes until the surface is just about firm to the touch.
While the meringue is cooking, prepare the whipped cream. Use your Cooks Professional stand mixer to whip the cream until stiff peaks form. Set to one side.
Remove the meringue from the oven and cover with more greaseproof paper for about 10 minutes. Dust a third sheet of greaseproof paper with icing sugar. Discard the one used to cover the warm meringue, and turn the meringue out onto the sugarcoated paper. Remove the paper lining the bottom – now top – of the meringue, and discard the now used paper.
Spread the whipped cream over the meringue, and then the passionfruit curd. Scatter the diced mango and passionfruit over the top. Use the greaseproof paper to roll up the roulade from one short end, keeping the join underneath. Sift some icing sugar over the top for decoration, and serve with more double cream if desired.
This classic dessert is the perfect combination of tart lemon and sweet meringue, culminating in a sweet treat that will have you reaching for seconds.
Ingredients
For the pastry
175g plain flour
100g cold butter, cubed
1 egg yolk
1 tbsp icing sugar
For the filling
100g caster sugar
125ml lemon juice (2-3 lemons)
Zest of 2 lemons
Juice 1 small orange
85g butter, cubed
3 egg yolks
1 whole egg
2 level tbsp cornflour
For the meringue
200g caster sugar
4 egg whites at room temperature
2 level tsp cornflour
Method
Make the pastry. Mix the plain flour, cold butter, icing sugar, egg yolk and 1 tbsp cold water in your Cooks Professional food processor. Pulse until the mix starts to bind, but be careful not to overwork it. Lightly flour your kitchen surface, then tip the pastry mixture out. Gather it together until smooth, then roll out and line a loose-bottom fluted flan tin. Trim and neaten the edges, pressing the pastry into the flutes. Don’t worry if it cracks; push it back together. Prick the base with a fork, line with foil – the shiny side down – and chill for between half an hour to an hour, or overnight.
Heat your oven to 200℃/180℃ fan/gas mark 6. Blind bake your pastry; fill the pastry case with baking beans or rice to weigh it down, then bake for 15 mins. Remove the foil and bake for another 5-8 minutes until the pastry is pale golden and cooked. Remove the pastry from the oven and set to one side. Lower the oven heat to 180℃/160℃ fan/gas mark 4.
While the pastry is baking, prepare the filling. In your Cooks Professional saucepan mix the cornflour, caster sugar, and lemon zest. Strain the lemon juice, and add to the saucepan gradually. In a jug, combine the orange juice with up to 200ml and strain into the saucepan. Cook over medium heat until thickened and smooth, making sure to stir constantly.
When the mixture starts to bubble, remove from the heat and add in the smaller amount of butter, beating until it has melted. In a bowl, beat the whole egg and 3 egg yolks together – save the whites for the meringue – and stir into the pan, returning it to medium heat. Continue to stir vigorously for several minutes until the mixture thickens, and plops from the spoon. It will bubble, but won’t curdle. Remove from the heat and set to one side.
Make the meringue. Use your Cooks Professional stand mixer to whisk the egg whites until soft peaks form, then add half of the sugar a spoonful at a time. Make sure to whisk between each addition, being careful not to overbeat the mixture. Whisk in the cornflour, and then add the remaining sugar a spoonful at a time until smooth and thick.
Reheat the lemon filling quickly, then pour it into the prepared pastry case. Spoon the meringue around the edges of the filling, then spread it so that it touches the pastry. This will help to anchor the meringue and prevent it from sliding. Avoid adding the meringue straight to the middle of the mixture, otherwise it may sink. Once you’ve added meringue to the edges, then you can pile the rest of it in the centre – make sure to spread it so that it touches the surface of the hot filling, then give it a swirl.
Return the now complete pie to the oven for between 18-20 minutes until the meringue topping is crisp and slightly coloured. Remove from the oven, and allow the pie to sit in the tin for half an hour. Remove it from the tin and leave to rest for at least another half hour to an hour before slicing.
Pastry is notoriously difficult among both amateur and professional chefs alike. But if you want to become the next star baker on the Great British Bake Off, pastry is one of the many baking talents that you’ll need to master.
There are different types of pastry that are used in a variety of recipes, each one as interesting and tricky to master as the last. If you want to learn more about pastry, read on!
The sheer amount of pastries available is impressive, but there are six main types of pastry. These are shortcrust, flaky, puff, filo, choux, and hot water crust. The main ingredients tend to be the same or similar for each – a mixture of flour, water, and fats such as butter mixed together to form a dough, used as the basis of many sweet and savoury treats.
Once the pastry dough is formed, it tends to be rolled out thinly to use in baking, depending on the type of pastry in use. Pastries like hot water crust use different methods to form the finished product.
Shortcrust is the type of pastry used in most recipes, due to its forgiving nature. It requires a fairly simple recipe, and tends to be quite foolproof, making it one of the most common pastries used today. It’s thought that shortcrust pastry was invented in Venice, with the first recipe being recorded in the 18th century.
To create a simple shortcrust dough, simply mix flour, butter, and salt, adding water to bind the mixture together. It can be mixed either by hand or by using a food processor or stand mixer; mixing the flour and fat together at the start inhibits the formation of gluten, leaving you with a ‘short’, or lovely crumbly, tender pastry.
The general rule of thumb is that you’ll need half the amount of fat to the amount of flour, e.g. for 200g flour, you’ll need 100g butter. As with most pastry, try to avoid handling it as much as possible, so as to prevent the butter from melting. You should try and chill it before using it to bake. Remember to add the liquid gradually – the less liquid your pastry has, the more buttery and crumbly it will be.
This particular variety is characterised by the flakes of pastry achieved through lamination. It can be an effort to make but is more forgiving than puff pastry. It has a higher ratio of fat to flour than shortcrust, with the butter being incorporated in stages, a little bit added after each fold. It can sometimes be called rough puff pastry and is a little easier than its more difficult companion.
The flaky layers are created by shard-like pieces of butter in the dough melting in the oven, releasing steam, which makes the layers puff up. The pastry expands when cooked due to the number of layers, leaving you with a beautifully crisp and flaky finish.
To create the ideal flaky pastry, layers of dough and fat are rolled and folded together. As with most pastry, it’s best made in cool conditions, and should be chilled after making and before being used so as to prevent the fat content from leaking out during cooking. The most rustic and one of the simpler doughs, flaky pastry is a favourite to use in both sweet and savoury recipes.
Puff pastry is notorious for being one of the most difficult pastries to master. It’s time-consuming to create the perfect puff, but your efforts will be worth it in the end when you bite into a perfectly crisp pastry. It’s thought to have been invented by a French baker, Cladius Gele, in 1645.
A dough of flour, sugar, salt, and water is rolled out into a rectangle, and the butter is layered on top. The dough is then folded around the butter, a process known as lamination, before being rolled out and folded repeatedly to create multiple layers. The dough should be chilled between each lamination so as to prevent the butter from becoming too warm and melting.
Careful temperature control is needed at all times to prevent it from merging with the dough. It’s important to chill the butter and dough at all times, so that the gluten is allowed to relax between roll-outs. During cooking, the moisture in the fat evaporates, causing lift and creating delicate layers; the melted butter adds a crispness to the pastry. Puff pastry tends to be used for Danish pastries.
A French favourite, choux pastry tends to be used for sweet treats such as profiteroles and eclairs. Choux gets its name from the French word for ‘cabbage’, due to resembling the same shape as a cabbage after cooking. This particular pastry is light, airy, and crisp, and unlike the other types of pastry on this list, it needs to be cooked before you can use it. It’s more batter-like in consistency than the other pastry types, which means it can be piped.
Choux pastry starts life as a mixture of milk or water with butter, which is heated together in a saucepan until the butter melts. Flour is then added to form a dough, and eggs are beaten in to enrich it, creating a wonderfully smooth, golden mix that is then piped.
The high percentage of water in the dough causes it to expand into a light, hollow pastry; the air lifts the pastry to treble in size while cooking. A hole is skewered into the choux halfway through cooking to let the steam out, before being placed back in the oven to dry out and become crisp. Once cooked, the choux is removed from the oven, filled with cream, and topped with chocolate. Choux pastry is used extensively in French patisserie cooking.
Filo pastry, or phyllo pastry as it is sometimes known, is perhaps the most difficult of pastry types to make. This is because it tends to dry out quickly – even if shop-bought. Due to its tricky nature, it is perhaps better to buy your own from your local shop rather than attempt to make it yourself. It is difficult and time-consuming to make by hand.
Filo is a paper-thin pastry made up of several layers, which are generally wrapped around a filling and brushed with butter to create delicate, flaky pastries, such as baklava. It’s important to keep the filo pastry hydrated, as it can dry out very quickly if made by hand.
This pastry is very fragile and requires careful handling. Make sure to brush it with oil or butter before shaping and cooking. It takes a great deal of skill to make it yourself, so unless you want to challenge your baking skills it might be easier to just buy it ready-made.
This traditional English pastry tends to be mainly used to make savoury pies. Hot water crust tends to be less flaky than the other traditional methods, but is crisp, tender, and serviceable. Traditionally, hot water crust pastry is hand-raised, but over the centuries bakers have been known to use tins, dishes, or bowls as a mould.
Hot water crust pastry is created by melting lard – not butter – in hot water, which is then brought to the boil, before flour is stirred in and it’s worked into a pliable ball. The pastry was then ‘hand raised’ from the bottom of the pie tin to the top, generally while still warm as it became harder to work with once the fat had hardened. Once the pastry case had been hand-raised, it was filled and then covered with a crust, decorated, and then put in the oven ready for baking.
It’s generally accepted that hand-raising your pie doesn’t give you a neat, uniform finish, as some sagging tends to occur during cooking. This is considered to be the mark of a good hand-made pie.
While these are just the main six types of pastry, there are a few variations which are pastries in their own right. The main six types listed above are the ones you’re most likely to find in your recipe.
Shortcrust can be sweetened to create a sweet crust, which tends to be used in a lot of desserts. Instead of binding the mixture with water, sugar and egg yolks are used to create a sweeter pastry that is better fitting for desserts.
Have you got a favourite type of pastry that you like to use in cooking? Or is there a type of pastry you’d like to know more about? Let us know over on our Facebook page!
Our peach cobbler is a tasty, no-fuss dessert that will hit the spot just right. Serve with lashings of vanilla ice cream.
Ingredients
2 tins peaches
120g caster sugar, plus extra for sprinkling
150g plain flour
150g butter, cubed, plus extra for greasing
1 small egg
1 tsp ground ginger
½ tsp ground cinnamon
1 tsp baking powder
Vanilla ice cream, to serve
Method
Preheat the oven to 180℃/160℃ fan/gas mark 4. Grease your Cooks Professional cast iron roasting dish with butter, then lay the drained peaches along the base. Sprinkle roughly 2 tbsp of the caster sugar and ground ginger over the peaches, then set the dish to one side.
In your Cooks Professional stand mixer combine the flour, remaining caster sugar, baking powder, ground cinnamon, and a pinch of salt. Mix until combined, then add the cubed butter. Continue mixing until it resembles breadcrumbs, then add the egg. Finish mixing until the ingredients come together to form a thick dough.
Spoon the dough mixture in dollops over the prepared peaches. Make sure to create a good covering, but leave some gaps for the dough to spread into. Sprinkle a little bit of caster sugar over the top, then bake in the oven for roughly 40 minutes, or until golden.
Remove from the oven and allow to stand for 5 minutes, then serve with lashings of vanilla ice cream.
A classic in Wales, these Welsh cakes will be the perfect addition to your cuppa. Traditionally cooked on a griddle, you can make these Welsh cakes just as easily using your Cooks Professional cast iron frying pan.
Ingredients
225g self-raising flour
100g butter
50g caster sugar, plus extra for sprinkling
50g sultanas or currants
1 egg, beaten with 3 tbsp milk
Pinch salt
Method
Use your Cooks Professional stand mixer to combine the flour and salt, then rub in the butter. Add the sugar and currants or sultanas and mix well. Add the egg mixture and continue beating together until you have a stiff dough.
Lightly flour a work surface, then roll out the Welsh cake dough until roughly 5mm thick. Use a biscuit cutter to cut out the Welsh cakes ready for cooking. Continue until all the dough is used, and are ready to be cooked.
In your Cooks Professional cast iron frying pan, heat a little butter over medium heat. Once the butter has melted and the frying pan is well greased, the Welsh cakes are ready to cook. Cook the cakes for roughly 3-4 minutes each side until golden brown.
Sprinkle caster sugar over the cooked Welsh cakes and serve immediately with your favourite beverage.
Our courgette and lemon cake is a delicious lighter alternative to heavier chocolate cakes. Packed full of flavour, it will soon become your favourite teatime treat.
Ingredients
300g grated courgette
250g soft unsalted butter
200g caster sugar
200g cream cheese
100g plain flour
100g self-raising flour
85g icing sugar
3 lemons
3 eggs
4 tbsp lemon curd
1 tsp baking powder
1 tsp vanilla extract
Pinch salt
Method
Preheat the oven to 180℃/160℃ fan/gas mark 4. Grease and line 2 round sandwich tins with butter and greaseproof paper, then set to one side. Zest two of the lemons to use in the cake, and save the third lemon’s zest for the icing. Juice the lemons, then put the juice in your Cooks Professional bowl before setting to one side.
Use your Cooks Professional stand mixer to combine 200g of the soft butter, caster sugar, courgettes, eggs, the zest of two lemons, and vanilla extract. Mix together until a creamy batter forms. Gradually stir in the mixed flours, baking powder, 1 tbsp of the lemon juice, and a generous pinch of salt.
Divide the batter between the prepared tins, then bake for roughly 25 minutes, or until golden and springy to the touch. Once cooked, removed from the oven and allow to cool in the tins for roughly 15 minutes, before turning out onto a cooling rack.
While the cake is baking, prepare the lemon drizzle. In a bowl, mix 1 tbsp lemon juice with 25g icing sugar, then set to one side.
Use a cocktail stick to prick the prepared sponges once they’ve been turned out onto the cooling rack, then spoon over the prepared drizzle and allow the cakes to cool completely.
Make the icing. Use your Cooks Professional stand mixer to mix the remaining icing sugar, butter, cream cheese, and the remaining lemon juice, as well as the remaining zest you set to one side earlier. Combine until you’ve got a creamy frosting.
Place one cake on a plate, and use half the frosting to cover it. Spread over the lemon curd, and then place the second cake on top. Use the remaining frosting to cover the top of your cake, then serve immediately.
Tempt your taste buds with this fruity cheesecake, packed full of succulent blueberries to really give you that sweet kick.
Ingredients
Punnet blueberries
300g digestive biscuits
275g caster sugar
140g butter, melted
3 x 300g cream cheese
200ml sour cream
3 large eggs
4 tbsp plain flour
2 tsp vanilla extract
1 tsp cornflour
Method
Preheat your oven to 200℃/180℃ fan/gas mark 6. Line an oven-prof baking dish with greaseproof paper. In your Cooks Professional food processor, blitz the digestive biscuits until they’re a fine crumb. Add the melted butter and continue to blitz together until fully combined. Pour the biscuit crumb into your prepared tin, and press down firmly with the back of a spoon until the base is covered. Bake for roughly 10 minutes, then set to one side to cool.
In your Cooks Professional saucepan, add the blueberries and 25g of the sugar. In a jug, combine the cornflour with roughly 1 tbsp of cold water, then add this to the saucepan. Cook gently over a medium heat until all the sugar has dissolved. Briefly increase the heat for a minute or two, allowing the blueberry mixture to bubble, until it becomes thicker in consistency and looks saucier. Set to one side to cool.
Use your Cooks Professional stand mixer to beat the cream cheese until smooth. Add the remainder of the sugar, whisking again before adding the eggs, soured cream, flour, and vanilla extract, mixing together until well combined.
Assemble the cheesecake. Pour roughly half the cheesecake mixture over the prepared biscuit base. Next, use a spoon to dot blobs of the blueberry sauce over the top, before covering with the remaining cheesecake mixture. Use a rubber spatula to smooth the the top of the cheesecake before drizzling the remaining blueberry sauce mixture over the top. Use the end of a spoon to ripple the blueberry sauce into the cheesecake.
Place your cheesecake in the oven and bake for 10 minutes; lower the heat to 110℃/90℃ fan/gas mark 5 and bake for another 30 minutes. Turn off your oven, and leave the cheesecake in there for roughly a further hour, and another hour on top of that with the oven door slightly ajar. Remove from the oven and set aside to cool at room temperature until completely cool. Chill in the fridge for at least 3 hours, or overnight if possible.
A twist on a classic. This fruity crumble will soon become the new family favourite!
Ingredients
3 x 410g tinned peaches in juice
140g plain flour
25g cold butter, grated
50g porridge oats
2 tbsp honey
Zest & juice 1 lemon
Method
Preheat your oven to 200℃/180℃ fan /gas mark 6. Drain the peaches, but reserve 4 tbsp of the juice from the tin. Place the peaches in your Cooks Professional roasting dish, scattering over the lemon zest, juice, and 1 tbsp honey, then use a wooden spoon or rubber spatula to mix it all together.
In a clean bowl, combine the grated butter, oats, flour, 1 tbsp honey, and the 4 tbsp of reserved peach juice. Use a wooden spoon to mix the ingredients together, then use your hands to rub it together until you have a rough crumbly mixture. Scatter the crumbly mixture over the peaches in your roasting dish.
Cook for around 35 minutes or until the crumble is lovely and golden on top. Remove from the oven and set aside for a few minutes to cool, then serve with a generous dash of double cream.
This traditional Turkish dish is the perfect sweet treat for those of you who just can’t get enough of nuts. Packed with pistachios, walnuts, and pecans, layered between filo pastry and sweetened with honey syrup, this will fast become your favourite dessert.
Ingredients
500g of filo pastry, or roughly two packs of ready-made filo pastry
200g pistachios, plus extra finely ground pistachios for garnishing
50g walnuts
50g pecans
3 tbsp honey
200g butter, with extra for greasing
For the syrup
50g honey
250g caster sugar
2 tsp orange extract
1 tsp cinnamon
200ml water
Method
Preheat your oven to 180℃/160℃ fan/gas mark 4. Grease a square cake tin, roughly 21cm x 21cm, with the extra butter. Use your Cooks Professional food processor to blitz 200g of the pistachios, and all of the walnuts and pecans, but be careful not to blitz them into a paste. Empty the nut mixture into a bowl, then stir in the honey and a pinch of salt. Set to one side. You can also blitz more pistachios to use as a garnish once the baklava is cooked – set these to one side in a clean bowl.
Melt the butter, either by heating on the hob in a Cooks Professional saucepan, or in the microwave. Cut the first pack of filo pastry in half so that it fits in the square tin. Place one sheet in the tin, then brush with the melted butter. Add another sheet on top of it, then brush this with butter again, and continue layering like this until the whole of the first pack of filo pastry is used up.
Scatter the honey and nut mixture over the top layer of pastry until well covered, using the back of a spoon to press it down. Open the second pack of filo, again cutting it in half so that the layers will fit in the tray. Add a sheet of pastry and brush with the melted butter, then continue the layering process until the final pack of filo pastry has all been used. Once the last sheet has been placed onto the baklava, pour any remaining butter over the top to finish. Using a sharp Cooks Professional knife, cut deep lines into the pastry to create diamond or square shapes. Bake in the oven for 20 minutes.
After 20 minutes, reduce the heat to 150℃/130℃ fan/gas mark 2 and cook for another 45 minutes. Meanwhile, prepare the syrup. In a clean Cooks Professional saucepan combine the syrup ingredients, heating gently until the sugar has dissolved. Boil the mixture for between 8-10 minutes or until the syrup has reduced to the consistency of runny honey.
Remove the baklava from the oven and pour the warm syrup over the top so that it runs down the lines you have cut. Allow to completely soak in, and leave the baklava to cool for roughly four hours. Top with the remaining pistachio garnish once cold and serve.
This zesty cake made with a light olive oil sponge and a chocolate and blood orange glaze is guaranteed to bring some overdue sunshine into your kitchen.
Ingredients
300g golden caster sugar
5 eggs
4 blood oranges, zested and juiced
150ml light olive oil
280g self-raising flour
140g white chocolate, chopped
Method
Begin by preheating your oven to 180°C / 160°C fan / Gas Mark 4., then greast a 2.5L bundt tin with some melted butter.
Crack the eggs into the bowl of a stand mixer along with the sugar and zest of three of the oranges, then whisk until pale and thick. Reduce the mixer speed to low, then pour in the olive oil and the juice from three of the oranges and mix until well combined.
Sieve the flour into the mixture and whisk again until you have a smooth batter. Pour into the prepared cake tin and place on a baking tray in the centre of your oven for around 35-40 minutes. Bake until an inserted skewer comes out clean. Cool in the tin for 5 minutes before turning out onto a wire rack.
Whilst your cake is cooling, make the glaze by placing the chocolate in a bowl and place over a saucepan of simmering water. Once melted, pour in the juice from the 4th orange and stir to combine. Remove the bowl from the heat and set to one side to cool slightly, until it is thick but still pourable.
Pour over the cake, allowing it to drip down the sides. the sprinkle the remaining orange zest over the top to decorate.
These fruity brûlées are the perfect summer dessert.
Ingredients
100g raspberries
300ml double cream
4 egg yolks
2 tbsp caster sugar
2 tbsp demerara sugar
Zest of half a lemon
1 vanilla pod
Method
Add the double cream and lemon zest to your Cooks Professional saucepan. Split the vanilla pod and scrape the seeds into the cream mixture, adding the pod in too. Gently heat until just before the cream starts to boil – there should be tiny bubbles forming at the edges. Take off the heat, and leave the mixture to infuse for roughly 15 minutes.
Heat your oven to 160℃/140℃ fan/gas mark 3. In a roasting tin, place 4 ramekins. Fill the roasting tin with boiling water, until roughly 2cm of the ramekins are uncovered.
Evenly divide the raspberries between the four ramekins, keeping a few spare. Using your Cooks Professional standmixer, whisk the egg yolks and caster sugar until pale and fluffy; this should take roughly 3 minutes. Remove the lemon zest and vanilla pod from the cream mixture, and slowly stir in the egg mixture. Pour the mixture from the saucepan into a jug, and then evenly divide it between the four ramekins, topping with the reserved raspberries.
Cook the brûlées in the oven for roughly 20-25 minutes, until the custard has formed a skin and has a slight wobble when you nudge the roasting tin. Allow the brûlées to cool, and then chill in the fridge for around 4 hours.
Heat the grill on high if you don’t have a blowtorch. Sprinkle the demerara sugar over the top of the brûlées, and place them under the grill to caramelise. Alternatively you can use a blowtorch if you have one. Grill the brûlées until the sugar has melted and crisped. Allow to settle for 5 minutes, before serving.
This sweet treat is the perfect thing to enjoy over a cuppa with friends and family.
Ingredients
55g butter
55g Demarara sugar
55g golden syrup
50g plain flour
½ level tsp ground ginger
½ tsp lemon juice
Method
Preheat the oven to 180℃ / 160℃ / gas mark 4. Line two baking trays with greaseproof paper. Oil a thickish handle of a wooden spoon, and then lay it on a cooling rack.
Add the butter, sugar, and syrup to a Cooks Professional frying pan. Heat gently over a low heat until the butter has melted, and the sugar has dissolved. Stir occasionally, and drag your wooden spoon across the bottom of the pan. When you can no longer hear the gritty granules being scraped along the pan and most of them have disappeared, you’ll know the sugar has dissolved. This should take roughly 15 minutes. Don’t allow the mixture to boil, as it may crystallize.
Leave the mixture to cool slightly; after roughly 2-3 minutes, sieve in the flour and ginger. Pour the lemon juice and stir well, to ensure it’s mixed thoroughly. Drop four teaspoonfuls of the prepared mixture onto each of the prepared baking trays, making neat circles about 10cm or 4 inches apart.
Bake in the preheated oven for roughly 10-15 minutes, or until the mixture is well spread out, looks lacey, and is a dark golden colour. Once baked you’ll need to work fast to shape the brandy snaps before they cool. It will be easier to bake one tray at a time. Remove each tray from the oven and leave for a minute or so to firm up slightly, then use a fish slice to lift a brandy snap from the baking tray. The mixture will need to be firm enough to remove, but still pliable enough to shape. You can check whether it’s ready by releasing around and under the edges with a small palette knife.
Quickly roll a circle of the warm mixture around the handle of the oiled wooden spoon, and join the brandy snap underneath./ Press lightly together to seal, then slide the brandy snap off the spoon and leave it to firm up on the wire rack, again with the join underneath. If any of the circles harden up too much to work with, return them briefly to the oven for a few seconds to soften them up again.
Repeat until all the mixture has been used. If the mixture in the pan becomes too firm to drop in neat spoonfuls, roll a teaspoonful of it into a small, smooth ball using your hands, and flatten it slightly on the tray with your fingers. When the finished brandy snaps are cold, you can store them in an airtight container. They will keep for up to a week. For added decadence, prepare some whipped cream with an electric whisk, then add to a piping bag. Pipe the cream into your prepared brandy snaps, and serve with a good cup of tea.
These are a firm favourite with Leah’s family, and never last long once they come out of the oven. Give these sweet treats a go and watch them disappear off the plate!
Ingredients
2 ½ cups flour
½ cup soft brown sugar
200g white chocolate, roughly chopped
1 cup mango, chopped
½ cup milk
¼ cup cream
90g butter, melted
1 egg, lightly beaten
Method
Preheat the oven to 180℃ / 160℃ / gas mark 4. Grease a 12 hole muffin tin with butter or oil. Sift the flour into a large mixing bowl, then stir in the sugar and white chocolate, then mix well with a wooden spoon or rubber spatula. Fold in the chopped mango gently. Make a well in the centre of the mixture.
Add the combined cream, butter, milk, and egg all at once. Mix with the rubber spatula until the ingredients are just combined. Be careful not to overmix – the batter should look quite lumpy. Spoon the batter into the prepared tin.
Bake for roughly 20 minutes, or until golden. Loosen the muffins with a flat-bladed knife, and turn out onto a wire rack to cool.
A classic, this pineapple upside-down cake will be perfect with your late morning cup of tea.
Ingredients
For the topping
50g softened butter
50g light soft brown sugar
7 pineapple rings in syrup, drained
Glacé cherries
For the cake
100g softened butter
100g golden caster sugar
100g self-raising flour
1 tsp baking powder
1 tsp vanilla extract
2 eggs
Syrup from the tinned pineapples
Method
Preheat the oven to 180℃ / 160℃ fan /gas mark 4. To prepare the topping, beat the butter and sugar together in your Cooks Professional stand mixer until creamy. Spread the butter and sugar mixture over the base of a prepared 20-21cm round cake tin. You can also spread it up the sides of the tin; it will likely spread to about a quarter of the way up the tin. Arrange the pineapple rings on top, and then place the glacé cherries in the centres of the rings.
Using your stand mixer, add the butter, caster sugar, flour, baking powder, vanilla extract, and roughly 2 tbsp of the syrup from the tinned pineapples. Beat together to a soft consistency. Spoon the mixture until the tin on top of the prepared pineapple, and smooth it out so the mixture is level. Bake for roughly 30 minutes, or until golden brown. Leave the cake to stand in the tin for around 5 minutes, then turn out onto a plate. Serve with a dash of cream, and enjoy!
This decadent pudding is sure to wow guests at your dinner parties. Lemon and raspberries are the perfect flavour combination that will have you reaching for more!
Ingredients
Unsalted butter, for greasing
100g caster sugar
3 tbsp plain flour, sifted
2 eggs, separated
1 lemon, zest and juice
200ml milk
100g raspberries
Method
Preheat oven to 190℃ / 170℃ fan / gas mark 5. Prepare the ramekins; thoroughly grease 5 ramekins with butter, then set to one side. In a large mixing bowl, use a stand mixer to combine the sugar, flour, egg yolks, and a pinch of salt. Stir in the lemon zest and juice, then gradually whisk in the milk.
In a separate clean bowl, whisk the egg whites until soft peaks form, and then fold this into the lemon mixture. Be careful not to over whisk; we want to keep all that lovely air you’ve just worked hard to get in the mixture. Gently spoon this into the prepared ramekins, and poke between 4-5 raspberries into each. You may need extra ramekins, depending on how large the ones you’ve chosen are.
Place the ramekins in a small roasting tin, and pour enough boiling water into the tin to come halfway up the side of the ramekins, creating a bain-marie. Cook for between 15-20 minutes, or until puffed up and pale golden.
Remove from the oven and leave for a few minutes to allow the bain-marie to cool. Carefully remove the ramekins from the bain-marie – the water may still be hot – and serve the lemon and raspberry puddings with cream and the remaining raspberries.
A favourite for our American cousins, these snickerdoodles are the perfect sweet treat to have with a cuppa.
Ingredients
250g unsalted butter
225g caster sugar
2 large eggs
2 tsps vanilla extract
345g plain flour
1 ½ tsp cream of tartar
½ tsp baking powder
1 tsp salt
For the cinnamon sugar
25g sugar
1 ½ tbsp cinnamon
Method
Preheat your oven to 180°C / 160°C fan / gas mark 4.
Use your Cooks Professional stand mixer to cream together the butter and the caster sugar for roughly 4-5 minutes, or until light and fluffy. Make sure to scrape the sides of the bowl to get all of the mixture well combined. Add the eggs and the vanilla extract, and mix for a further few minutes.
Add the cream of tartar, baking powder, salt, and flour. Mix until well combined. Wrap the dough and leave it in the fridge for roughly 20-30 minutes.
In a small bowl, mix together the smaller amount of sugar with the cinnamon to create the cinnamon sugar. Line a baking tray with greaseproof paper.
Remove the snickerdoodle dough from the fridge, and roll into small balls until they’re all round and smooth. Drop the snickerdoodle balls into the cinnamon sugar, ensuring they’re well covered.
Place the well-covered snickerdoodle balls on the prepared baking tray. For a flatter biscuit, gently press down in the centre of each ball before placing the tray in the oven. This will help to prevent them from puffing up in the middle.
Cook for roughly 9-11 minutes, or until golden. Remove from the oven and allow to cool slightly on the baking tray before putting them on a wire rack to cool completely. Serve with your favourite beverage and enjoy!
These classic flavours are sure to wow guests who pop over for a cuppa. Why not treat yourself to a cheeky slice for elevenses?
Ingredients
For the sponge
350g self-raising flour, plus 1 tbsp
250g unsalted butter
100ml whole milk
250g caster sugar
1 small, ripe pineapple, or 300g tinned pineapple
Seeds and juice of 2 passionfruits
4 large eggs at room temperature
1 tsp vanilla extract
For the icing
100g icing sugar
Seeds and juice of 1 passionfruit
2-3 tsp whole milk
Method
Preheat the oven to 180°C/160°C fan/gas 4. If you opted for fresh pineapple, prepare the pineapple. Top and tail the fruit, and then use a sharp knife to cut the skin away. Slice the flesh into roughly eight wedges, and remove the core from each wedge. Cut the pineapple into smaller chunks, roughly the size of a £1 coin, and then roast them on a baking tray for roughly 20 mins or until they are drier and golden. Leave to one side to cool.
Prepare the bundt tin; rub 1 tbsp of the butter around the inside of a 25cm bundt tin, and sprinkle in 1 tbsp of the flour. Turn the pan on its side and roll it, gently tapping to move the flour around and coat the butter. Tap out any excess.
In a bowl, mix the milk and the passionfruit together, then set to one side for a few minutes; the acidity of the juice will sour the milk a little. Using a stand mixer or electric beaters, beat together the remaining butter and sugar in a bowl until light and fluffy. Add the milk and passionfruit mixture, flour, eggs, vanilla extract, and a ¼ tsp of salt. Mix until creamy and smooth, and then fold in the pineapple pieces. Spoon the mixture into the prepared tin and level the top.
Bake the bundt cake for roughly 50-55 mins or until risen, golden, and a knife or skewer comes out clean from the deepest part of the cake. Remove from the oven and place on a cooling rack, letting the cake rest in the tin until barely warm.
Prepare the glaze. Sift the icing sugar into a bowl, then make a well in the middle. Slowly mix the passionfruit and milk in the well to make a smooth glaze. Turn the cake out onto a plate, and brush the glaze over the top. Leave to cool and set.
If you’ve watched The Great British Bake Off, you’ll have heard the judges asking for the bakers to make a genoise sponge at some point in the competition. If you ever want to enter the Bake Off tent, or even become a baking extraordinaire, knowing how to make a genoise sponge is a useful skill under your baking belt. But what exactly is genoise sponge, and how can you make it at home?
Genoise is a sponge which originates from Italy, and is generally associated with French cuisine. It’s a bit different from your average sponge cake – it doesn’t require any chemical additives such as baking powder or bicarbonate of soda to rise. Instead, it relies entirely on the air that you work hard to whisk into the batter. It is notoriously difficult to make, and has had many a baker throw up their whisks in anger. The key to getting it right is in how you whisk your eggs.
Whereas with a normal sponge cake you would just mix the eggs together with the creamed butter and sugar, you need to beat your eggs a little differently for a genoise sponge. The key is to whisk them together with the sugar over a bain-marie; start them off like this, then remove them from the heat and mix them with your electric mixer until the mixture gets to the ribbon stage.
The secret of a good genoise sponge lies within the heating of the eggs, and of course the properties of the eggs themselves. The protein in eggs is made up of tightly-woven molecules; when these molecules are heated, they unwind and reconnect with other nearby proteins, which helps to give bakes the structure that we want from a good genoise.
Chef’s tip: Once you’ve successfully made your batter and it is sufficiently aerated, be gentle when placing your batter in the tin for cooking. Try and bring your bowl as close to the tin as possible, as you want to ensure you keep as much as you can of that lovely air you’ve worked hard to get into the batter.
Why not be brave and give it a go yourself! After all, the only way you’ll make the perfect genoise sponge is to practice, practice, practice. As genoise gets most of its flavour from the syrup or toppings you choose to add to it, it’s not a sponge that you’ll eat on its own. Take a look at our delicious strawberry genoise sponge recipe to get you started! Have you got a favourite genoise recipe? Let us know over on our Facebook page.
Notoriously tricky to make, a genoise sponge is a lighter alternative to a traditional sponge. This strawberry based recipe is a wonderful way to capture the taste of summer!
Ingredients
For the genoise:
3 large eggs
95g caster sugar
20g butter
95g plain flour
Pinch of salt
For the compote:
400g strawberries, roughly quartered
4 tbsp sugar
2 tbsp lemon juice
A few drops of balsamic vinegar
For the topping:
600ml double cream
400g strawberries, sliced
Method
Preheat your oven to 180°C / 160°C / gas mark 4. Line and grease a cake tin ready for your genoise. Melt the butter in a saucepan on medium heat, and then set to one side to cool slightly while to prepare the sponge.
Heat a little water in another saucepan to use for your bain-marie. Remember not to let the water touch the bottom of the bowl, or let any moisture get in with your eggs and sugar mixture. Next, put the eggs and sugar together in a glass bowl, and place it on top of the gently simmering saucepan. Make sure to whisk it constantly on the heat, otherwise you’ll have sweetened scrambled eggs rather than a tasty genoise. Keep mixing until the mixture is warm to the touch, and then remove from the heat and continue whisking with a stand mixer until it reaches the ribbon stage.
In a separate bowl, combine the flour and salt, then sieve half of this over the whisked eggs and sugar. Use a rubber spatula to mix it in – very gently so as to retain all of the air you’ve worked hard to whisk into the batter – stir in a figure of 8 motion, making sure to scrape the bottom of the bowl until it’s well combined. Don’t overwork the batter or you’ll lose all that precious air. Once combined, sieve over the remaining flour and mix it in just as gently.
Next you’ll want to add the melted butter. Drizzle this around the edge of the bowl, and gently stir this in with your rubber spatula.
Carefully pour the batter into the prepared tin, as close to the tin as possible so as to not lose any air, and cook in the oven for 25 minutes, or until the sponge is golden and springy to the touch; it should be just beginning to come away from the sides. Leave the cake to fully cool in its tin.
While the cake is cooking and then cooling, you can prepare the compote. Add the quartered strawberries, lemon juice, and sugar to a saucepan. Gently heat until the sugar dissolves, then bring the mixture to a simmer. Cover and cook for roughly 3 minutes, or until syrupy and dark red. Put to one side to cool, and add the balsamic vinegar.
In a separate bowl, whisk the double cream until it holds its shape, then set to one side.
Once the genoise is cooled, remove from the tin and slice in half. On the bottom layer, add half the compote, half the cream, and half the remaining strawberries. Add the top layer of genoise, then repeat with the remaining compote, cream, and strawberries.
The classic flavour combination of raspberry and dark chocolate makes these delicious little cupcakes the perfect sweet treat for your Valentine this February 14th.
Ingredients
For the cupcakes
140g flour
140g caster sugar
30g dark cocoa powder
1 tsp baking powder
1/2 tsp salt
1 egg
115ml buttermilk
115ml vegetable oil
3/4 tsp vanilla extract
115ml boiling water
For the icing
115g butter
115g vegetable shortening
560g icing sugar
4 tbsp raspberry puree
Method
Preheat your oven to 150°C / 130°C Fan / Gas Mark 2, and line a muffin tin with paper cake cases.
Tip all of the dry ingredients into the bowl of a stand mixer and gently whisk together. Add in the egg, buttermilk and vegetable oil and mix to combine.
Add the vanilla extract to the boiling water, then tip into the cake batter and give it a final mix.
Divide the cake mix between the cake cases and bake in the oven for about 20 minutes until a clean skewer comes out.
Once baked, remove from the oven and allow to cool in the tin before transferring to a wire rack to finish cooling.
To make the icing, add the butter and shortening to your stand mixer bowl and beat until smooth. Slowly and gradually add in half of the icing sugar and continue beating until you have a smooth consistency.
Pour in the raspberry puree and beat with the remaining icing sugar.
Ice the cupcakes and decorate as you best see fit.
It’s #WorldPizzaDay, and this pizza dough recipe doesn’t only make an amazing, delicious base to build your favourite Italian treat on but is also 100% gluten free!
Make a well in the centre of the mix, and pour in 250ml warm water along with the olive oil. Working quickly, combine everything together with your hands until you have wet, paste-like mixture.
Cover and store in the fridge for up to 24 hours before using.
Sometimes the stars align and grant us a special day such as World Nutella Day falling on hump day! If, like us, you’re taking part in this very special event then this chocolate hazelnut cheesecake is the perfect way to celebrate.
Ingredients
140g unsalted butter
300g digestive biscuits
500g cream cheese
85g icing sugar
300ml double cream
1 tsp vanilla extract
5 Ferrero Rocher, chopped
4 tbsp Nutella
25g hazelnuts, chopped
Method
Begin by melting the butter in a saucepan over a medium heat, then blitz the biscuits in a food processor. Pour the melted butter into the biscuit crumbs, then pulse until everything comes together. Tip into a springform cake tin and press firmly in to make the base. Pop in the fridge to set.
Grab a bowl and beat together the cream cheese and icing sugar until soft. In a separate bowl, whisk together the cream and vanilla until you have soft peaks, then gently fold into the cream cheese.
Stir through the chopped Ferrero Rocher, then spoon the mixture over the base and smooth out. Cover with cling film, return to the fridge and chill for at least 6 hours.
Once the cheesecake has set, melt the Nutella over a low heat for about 3-4 minutes until it is runny. Allow to cool slightly, then pour over the top of the cheesecake and spread to the edges. Release from the tine and decorate with the chopped hazelnuts.
Increasingly fashionable in cooking, matcha is made from ground green tea leaves and is a popular ingredient in Asian desserts. Used in this recipe, it adds incredible flavour to this cake with it’s white chocolate glaze.
Ingredients
For the sponge:
6 eggs, separated
200g caster sugar
1 tsp vanilla extract
100g plain flour
25g ground almonds
50g butter, melted
For the matcha mousse:
5 gelatine sheets
600ml double cream
2 tbsp matcha powder
250g icing sugar
For the glaze:
150ml double cream
150g white chocolate
1 tsp matcha powder
Method
Begin by heating your oven to 180°C / 160°C / Gas Mark 4, and grease two 20cm cake tins with some vegetable oil, then line with baking parchment.
Pop the egg yolks, caster sugar and vanilla into a bowl, and the egg whites into another bowl. In a third bowl, combine the almonds, flour and a pinch of salt.
Beat the egg whites until they have double in size and are holding stiff peaks, then whisk the eggs yolks until thick and pale. Transfer a spoonful of egg whites into the yolks and mix to loosen, before gently folding in the remaining egg whites.
Sprinkle the flour mixture into the bowl, and then drizzle the melted (and cooled) butter around the inside edge of the bowl. Fold everything together until just combined, then divide the mixture between the cake tins and bake in the centre of the oven for around 25 minutes until a clean skewer comes out. Cool in their tins for 30 minutes before transferring to a wire rack to cool completely.
In the meantime, bring a kettle of water to the boil and place the gelatine sheets in a bowl of cold water to soften. Pour 150ml of double cream into a saucepan and combine with 50ml of hot water. Add the matcha powder and whisk over a gentle heat until well combined. Remove from the heat and squeeze in the water from the gelatine leaves then add them, one by one, to the hot matcha cream, whisking until they have dissolved.
Pour the warm cream into a bowl and place in the fridge to cool – you want it to cool to room temperate, so don’t leave it in their for too long.
Now, line one of your cake tins with a double layer of cling film, ensuring the edges are well covered, then place one of the sponges flat-side-down in the tin.
Pour the remaining 450ml of cream into a bowl and whisk together with the icing sugar until it is holding soft peaks, then fold through the cooled matcha mixture. Top the sponge with this, then place the remaining sponge on top, flat side up. Wrap with clingfilm and refrigerate for at least 4 hours.
To make the glaze, melt the white chocolate, cream and matcha powder together in a saucepan over a low heat until everything is well combined. Set to one side to cool and thicken for about 10 minutes, then remove the cake from the fridge and unwrap. Release the cake from the tin and remove all clingfilm, then scrape around the edge with a palette knife to remove any excess cream.
Using baking parchment, create a tight collar around the cake, about 2cm higher than the top, then pour the cooled chocolate glaze over the top. Return to the fridge and chill for another 30 minutes.
Carefully remove the baking parchment and decorate the exposed surface and top with a mixture of icing sugar and matcha powder.
The perfect flavour partners of dark chocolate and raspberries combine to make this delicious torte a real showstopper.
Ingredients
For the cake:
225g dark chocolate (at least 70% cocoa solids)
175g unsalted butter, diced
2 tsp vanilla extract
1/4 tsp instant espresso powder
100g toasted almonds
2 tbsp plain flour
1/2 tsp salt
5 eggs
140g golden caster sugar
12 raspberries, plus more for decoration
4 tbsp raspberry jam
For the glaze:
140g dark chocolate, chopped
100ml double cream
Method
Begin by heating your oven to 160°C / 140°C Fan / Gas Mark 3, then line two 23cm cake tins with baking parchment.
Break the chocolate into a bowl, add the butter and melt in the microwave in short bursts. Set to one side to cool, then stir in the vanilla extract and the espresso powder.
Blitz the almonds in a food processor until they are finely ground, then mix in the flour and salt and transfer to a bowl. Beat the eggs using an electric whisk until they have double in volume, then add the sugar and whisk for another minute.
Fold in the chocolate mixture until combined, and then sprinkle in half of the flour and fold in, followed by the other half. The mixture will be slightly runny, but this is normal so don’t be alarmed!
Divide the mixture between the two cake tins and bake for around 15 minutes, until a skewer comes out with a few crumbs attached. The cakes should be slightly undercooked when removed from the oven. Cool them in their tins, then turn out onto a wire rack.
Place one of the cake halves on a serving plate. Mash together the 12 fresh raspberries with the jam, then spread this over the base of the cake. Set the other cake on top.
Now. make the glaze by bringing the cream to a boil in a saucepan. Pop the chocolate in a bow, then pour in the hot cream and mix together to melt. Leave for a few minutes until the chocolate has thickened slightly, then spread over the top and sides. Decorate with the remaining raspberries, then refrigerate for up to 24 hours. Remove from the fridge one hour before serving.
This classic shortbread recipe is super easy to make, and is the perfect accompaniment to any Burns Night celebration!
Ingredients
300g soft butter
140g golden caster sugar
300g plain flour
140g rice flour
Method
Whizz together the butter and sugar in a food processor until you have a smooth mixture. Then tip in both of the flours and blitz again until everything comes together.
Tip the dough out onto a lightly floured surface then, using a rolling pin, roll the mixture out. Grab a biscuit cutter and cut into rounds, then bring the leftover dough together, reform and roll again to cut out more rounds.
Cover with cling film and smooth over to remove any wrinkles. Pop in the fridge and chill for at least 30 minutes, up to 2 days.
Heat your oven to 180°C / 160°C / Gas Mark 4. Remove the cling film from the tray and then lightly prick the shortbread all over with a fork.
Sprinkle a little sugar over the top, then place in the oven and bake for 20-25 minutes.
Remove from the oven and allow to cool in the tin. Keep stored in an airtight container.
Gooey, fudgy, chocolately and indulgent. These salted caramel brownies are exactly what you need for that end of the week treat!
Ingredients
200g unsalted butter
100g dark chocolate
100g milk chocolate
397g can of caramel
1 tsp sea salt flakes
200g golden caster sugar
4 eggs
130g plain flour
50g cocoa powder
Method
Begin by heating your oven to 180°C / 160°C / Gas Mark 4, then grease a 23cm square baking tray and line with baking parchment.
Take a saucepan and melt the butter over a gentle heat, then break in the chocolate. Remove the pan from the heat and allow the chocolate to melt in the residual heat.
Mix together 175g of the caramel with the sea salt in a small bowl
Pop the rest of the caramel in a large bowl and tip in the sugar and the eggs. Beat with an electric whisk until even, and then whisk in the chocolate and butter mixture.
Grab another bowl and combine the flour and cocoa powder along with a pinch of salt. Sift this into the chocolate mixture and beat until smooth.
Pour half of your brownie mixture into the lined tin and smooth off with a spatula. Now spoon half of the salted caramel on top in 5 thick, evenly spaced stripes.
Pour the rest of the brownie batter over the top and smooth again, then top with the rest of the caramel, repeating the stripes. Drag a skewer through the top layer of salted caramel to make a pattern on top.
Scatter a little more sea salt over the top, then bake for around 25-30 minutes until risen with a firm crust on top. Allow to cool completely, then cut into squares and dig in!
Providing 1 of your 5 a day, these delicious low-fat muffins are packed full of carrot cake flavours. Perfect for a healthy-ish treat!
Ingredients
800g canned cannellini beans, drained
2tsp ground cinnamon
100g porridge oats
4 eggs
2 tbsp rapseed oil
4 tbsp maple syrup
2 tsp vanilla extract
1 orange, zested
170g carrot, grated
100g raisins
80g pecans, roughly chopped, plus 12 extra for decorating
2tsp baking powder
Method
Begin by heating your oven to 180°C / 160°C Fan / Gas Mark 4, then line a 12 hole muffin tin with paper cupcake cases. Pop the beans into a bowl and add the cinnamon, oats, eggs, oil, maple syrup, vanilla extract and orange zest. Grab a stick blender and blitz everything together until smooth.
Stir in the carrots, raisins, chopped pecans and baking powder and mix. Spoon into the paper cases, then top each muffin with a reserved pecan.
Bake for 20 minutes, then allow to cool on a wire rack before eating.
New Years Eve and champagne go hand in hand, and if you’re throwing a dinner party to see 2020 in, these delicious raspberry possets fit the bill perfectly!
Begin by popping the raspberries and champagne in a food processor and blitz together until you have a smooth puree. Tip out into a sieve and push through over a bowl using a wooden spoon, then discard any seeds and pulp left behind.
Now take a saucepan and pop in the sugar and cream. Warm over a gentle heat until the sugar has dissolved, then increase the heat until the cream is just beginning to boil, then allow to bubble away for a couple of minutes.
Turn off the heat, then stir in the raspberry and champage puree. Allow to cool for 15 minutes, then decant into two glasses. Refrigerate for 30 minutes, then scatter over the dried raspberry pieces. Return to the fridge and chill for at least two hours.
What’s Christmas without a yule log? This recipe takes the festive favourite to a whole new level by using a brandy butter as the filling, and chocolate truffle icing for that extra bit of indulgence. Well, it is Christmas after all…
Ingredients
For the sponge:
5 eggs, separated
125g light brown soft sugar
40g cocoa powder
1/2 tsp mixed spice
1/2 tsp ground ginger
White caster sugar, for sprinkling
For the filling:
100g soft butter
250g icing sugar
4 tbsp brandy
1 tsp vanilla extract
For the icing:
100g dark chocolate, chopped
100ml double cream
25g butter
Method
Begin by lining a 35cm x 25cm Swiss roll tin with baking paper, and heating your oven to 180°C / 160°C fan / Gas Mark 4. Pop the egg whites into a bowl and beat with an electric whisk (or stand mixer) until they are just holding peaks. Add in half of the sugar 1 tbsp at a time, constantly beating, until the peaks hold. Set everything to one side.
Take another bowl and pop in the egg yolks. Beat these together with the remaining sugar until pale and fluffy. Sift in the cocoa and spices, and gently fold through. Beat in a third of the egg whites, then gently fold through the rest until you have an airy mousse. Pour into the tin and spread evenly, then bake for 12-15 minutes.
Sprinkle caster sugar over a large sheet of baking paper, and turn the cake out onto it. Remove the sheet of paper the cake baked in, and cover the cake with a clean tea towel. Leave to cool completely, then score along the inside edge of one of the short sides and roll up, using the parchment to help.
Now, make the filling by beating together the butter, icing sugar, brandy and vanilla for about 10 minutes until light and fluffy. Unroll the sponge, and turn it so that one long edge is facing you. Using a palette knife, spread the buttercream over the sponge, keeping the furthest end from you clear. Re-roll the sponge.
Make the frosting by tipping the chocolate into a bowl. Gently heat together the cream and butter in a saucepan until everything it reaches a simmering point. Now tip in the chocolate and stir together until you have a smooth mixture. Leave to cool, stirring occasionally, until you have a thick mix. Spread over the sponge and, using a fork, mark tree bark lines in the frosting. Pop in the fridge and allow to chill for at least 30 minutes.
When the frosting is chilled and firm, remove from the fridge and adorn with festive decoration. Serve and enjoy!
Whether you’re looking to have something stashed away in the cupboard to snack on whilst you’re watching a movie, or impressing friends and family with a show-stopping dessert for your Christmas dinner, one of the best things about Christmas is getting the opportunity to bake (and eat!) a variety of sweet treats.
So why not take a look at these delicious offerings from some of our favourite food bloggers and get inspired for your festive baking adventures!
No-Bake Tia Maria Cheesecake
Christmas is all about a bit of decadence, and this Tia Maria cheesecake from Neil’s Healthy Meals certainly fits the bill! Boozy, rich and creamy, this cheesecake requires no baking, which means no clock-watching or temperature monitoring – simply leave in the fridge overnight to set.
If you’re looking for a more ‘adult’ dessert, check out this Tia Maria cheesecake from Neil’s Healthy Meals.
Gingerbread Cake with Cream Cheese Frosting & Sugared Cranberries
Talk about a show-stopper! This fabulous cake recipe from The Boy Who Bakes will wow your guests at your Christmas dinner table, and also makes the perfect centre piece for a party buffet. Flavoured with traditional spices, and adorned with sugared cranberries, we’re pretty sure your guests won’t be able to resist temptation.
If you’re looking for that wow-factor in a Christmas dessert, this recipe from The Boy Who Bakes is a must. Try it for yourself.
Gluten Free Chocolate Orange Yule Log
Christmas wouldn’t be Christmas without a yule log, would it?! This recipe from Becky Excell at Gluten Free Cuppa Tea combines the much-loved flavour combination of chocolate and orange, and is also gluten free – perfect for any coeliac guests.
Try this delicious gluten-free yule log from Becky Excell.
No-Junk Christmas Chocolate Bark
This recipe from Eats Amazing is one that will be loved by both adults and children alike, and certainly one that the kids will love getting involved with making! Not only is it the perfect sweet treat for a keeping a stash of in the house, but it also makes a wonderful homemade gift for friends and family.
Perfect for homemade gifts! Try this no-junk chocolate bark from Eats Amazing.
Vegan Chocolate Penguin Cupcakes
With more people switching to a plant-based diet it’s imperative to have a vegan option to choose from, and these adorable penguin cupcakes from The Little Blog Of Vegan are the perfect Christmas dessert (or gift!) for anybody looking for an animal-product-free sweet treat.
These adorable vegan cupcakes from The Little Blog Of Vegan are the ideal dessert for any vegan guests this Christmas.
A gloriously fruity, rich, homemade Christmas pudding is easier to make than you might think! Serve with the accompanying recipe for brandy and ginger butter for a Christmas dessert your whole family will love.
Ingredients
For the Christmas pudding
50g blanched almonds, chopped
2 large cooking apples, peeled, cored and chopped
200g candied peel, chopped
1 whole nutmeg (3/4 grated)
1kg raisins
140g plain flour
100g soft, white breadcrumbs
100g light muscavado sugar
3 eggs
2 tbsp brandy or cognac
250g butter, fridge cold
For the brandy & ginger butter
175g unsalted butter
Zest of half an orange, grated
5 tbsp icing sugar
4 tbsp brandy or cognac
2 pieces of stem ginger, finely chopped
Method
Mix together the almonds, apples, candied peel, nutmeg, raisins, flour, breadcrumbs, sugar and brandy (or cognac) in a large bowl. Grate a quarter of the butter into the bowl, then stir everything together. Repeat until all the butter is grated, then mix everything for 3-4 minutes.
Now, generously butter two 1.2 litre bowls and put a circle of baking parchment in the bottom of each, then pack in the pudding mixture. Cover with a double layer of parchment, then tie with string, trimming off any excess paper.
Now, stand each bowl on a large sheet of tin foil and bring the edges up over the top. Put another sheet of foil over the top, and bring it down underneath to make a double package. Tie with more string, making a handle for easy lifting in and out of the pan.
Boil or steam the puddings for around 8 hours, topping up with water when you need to. Remove from the pans, and leave to cool overnight.
Once cold, remove the wrappings and re-wrap in new baking parchment, foil and string. Store in a cool, dry place until Christmas.
To make the brandy butter, cream together the butter with the orange zest and icing sugar. Slowly beat in the brandy or cognac, along with the chopped ginger. Place in a bowl and store in a cool, pop in the fridge to set.
On Christmas day, boil or oven steam the puddings for one hour, then unwrap and turn out. Serve with the brandy butter, and set the pudding alight by warming 3-4 tbsp brandy in a small pan, then pour over the pudding and set light to it.
Gingerbread is one of those quintessential Christmas foods, and these festive biscuits are perfect for adding to a homemade gift hamper, decorating your tree with or simply as a go-to stash of sweet treats.
Ingredients
75g unsalted butter, softened
50g caster sugar
1/2 tsp bicarbonate of soda
50g golden syrup
2 egg yolks
250g plain flour
1/2 tsp ground cinnamon
1/2 tsp ground ginger
Method
Begin by heating your oven to 180°C / 160°C Fan / Gas Mark 4. Pop the butter and caster sugar together in a bowl, and beat until creamy.
Stir in the bicarbonate of soda, golden syrup and egg yolks, then sift in the flour, cinnamon and ginger. Mix everything together until you have a biscuit dough.
Divide into two balls and knead until everything comes together. Cover and chill in the fridge for 30 minutes.
Roll out one ball at time to about the thickness of a £1 coin, then begin stamping out festive shapes with Christmas cookie cutters. Re-roll any trimmings, bring them back together and stamp out more shapes.
Place the biscuits onto a lined baking sheet and bake for 10-12 minutes until golden brown and slightly risen. Allow to cool on a wire rack before decorating however you see fit.
There’s no denying it – Christmas is in full swing! And is there anything more ‘Christmassy’ than a good old mince pie? No, we don’t think so either.
Ingredients
225g cold butter, cubed
350g plain flour
100g icing sugar
410g jar mincemeat
Method
Begin by heating your oven to 200°C / 180°c Fan / Gas Mark 6. Take a food processor and whizz together the butter, flour and icing sugar until it comes together into a ball.
Turn it out the dough, knead lightly for a couple of minutes and then cut into 12 equal pieces. Now, taking one piece of dough at time, cut off two-thirds and press into the base of a muffin tin hole. Repeat with each piece of dough until you have 12 open pie cases.
Spoon the mincemeat into the pastry cases.
Take the remaining 12 smaller pieces of dough, roll into a ball and flatten to make disc. You can either leave as a circle, or cut a shape out with a cookie cutter. Lay one piece on top of each pie, then prick the top to allow any steam to escape.
Bake for 12-15 minutes until golden, then allow to cool in their tin. Once cool, remove from the tin, dust with icing sugar and serve.
It’s Thanksgiving in America today! To celebrate with our state-side friends, try giving this recipe for pumpkin pie a go – a staple dessert at any Thanksgiving table.
Ingredients
750 pumpkin, peeled, deseeded and cut into chunks
350g sweet shortcrust pastry
140g caster sugar
1/2 tsp salt
1/2 tsp freshly grated nutmeg
1 tsp cinnamon
2 eggs, beaten
25g butter, melted
175ml milk
1 tbsp icing sugar
Method
Take a large saucepan and pop in the pumpkin. Cover with water and bring to boil, then clamp on a lid and simmer for around 15 minutes until tender. Drain and allow to cool.
Heat your oven to 180°C / 160°C fan / Gas Mark 4. Roll out the pastry on a lightly floured surface, then use it to line a 22cm loose bottomed tart tin. Place in the fridge and chill for 15 minutes.
Line the pastry case with baking paper and baking beans, and blind bake for 15 minutes. Remove from the oven and take out the beans and paper, then cook for a further 10 minutes. Remove from the oven and allow to cool slightly.
Increase the oven temperature to 220°C / 200°C fan / Gas Mark 7. Push the pumpkin through a sieve into a large bowl. In a separate bowl, combine the sugar, salt, nutmeg and cinnamon. Mix in the eggs, butter and milk, then stir into the pumpkin puree.
Pour into the tart case and cook for 10 minutes, then reduce the temperature to 180°C / 160°C fan / Gas Mark 4 and continue to bake for 35-40 minutes. Remove from the oven, leave to cool then release the pie from it’s tin. Dust with icing sugar and serve!
The addition of ground almonds makes for a delicious, crunchy topping to cinnamon-spiced plums. The perfect dessert for cosying up on a winter’s evening.
Ingredients
For the filling:
800g plums, halved and stoned
50g light brown sugar
1 orange, zested
1 tsp cinnamon
1 tsp plain flour
For the topping:
250g plain flour
150g butter
80g caster sugar
80g demerara sugar
50g ground almond
Method
Begin by heating your oven to 200°C / 180°C Fan / Gas Mark 6, and pop the plums into a shallow dish. Mix together the sugar, orange zest, cinnamon and flour in small bowl and sprinkle over the plums, then drizzle over 2 tbsp water.
Next, place all the topping ingredients in a food processor and pulse sporadically until the mixture begins to clump together a bit. Alternatively, rub the butter into flour using your fingertips, then mix in the remaining ingredients.
Scatter the topping over the plums, and bake in the oven for 30-40 minutes until golden brown.
Guaranteed to please all the family, sticky toffee pudding is one of the ultimate indulgent desserts, and is perfect for hunkering down on a cosy winter night in front of the TV.
Ingredients
For the pudding:
225g medjool dates, chopped
175ml boiling water
1tsp vanilla extract
175g self-raising flour
1tsp bicarbonate of soda
2 eggs
85g butter, softened
140g demerara sugar
2 tbsp black treacle
100ml milk
For the toffee sauce:
175g light muscovado sugar
50g butter, cubed
225ml double cream
1tbsp black treacle
Method
egin by popping your chopped dates in a bowl, then pour over the boiling water. Leave to soak for 30 minutes, then mash slightly with a fork before stirring in the vanilla extract.
Preheat your oven to 180°C / 160°C Fan / Gas Mark 4. Grease seven miniature pudding tins, and place them on a baking sheet.
Mix together the flour and bicarbonate of soda in one bowl, and beat the eggs together in a separate bowl.
Beat together the demerara sugar and the butter together until creamy, then add in the eggs a little at time, still beating. Next, add in the black treacle, then gently fold in one third of the dry ingredients, followed by half the milk. Repeat until all of the dry ingredients and milk have been incorporated into the mixture.
Stir in the dates, then spoon the mixture evenly between the pudding tins. Bake for 20-25 minutes until risen and firm.
Meanwhile, make the sauce by adding the muscovado sugar, butter and half of the cream in a saucepan. Bring to a boil over a medium heat, stirring constantly, until the sugar has dissolved.
Stir in the black treacle, and slightly increase the heat. Let everything bubble away for a few minutes until you have a rich, toffee colour. Take the pan off the heat and stir in the remaining cream.
Remove your puddings from the oven and tip out of their tins. Serve with the toffee sauce and a dollop of ice cream.
The festive season is right around the corner, and November is the perfect time to start making your Christmas cake so you can feed it with brandy, whisky or rum ready for a rich, delicious cake on the big day!
Ingredients
1kg mixed dry fruit
1 orange, zest and juice
1 lemon, zest and juice
150ml brandy, whisky or rum
250g butter
200g light soft brown sugar
175g plain flour
100g ground almonds
1/2 tsp baking powder
2 tsp mixed spice
1 tsp cinnamon
1/4 tsp ground cloves
100g flaked almond
4 eggs
1 tsp vanilla extract
Method
Get a large saucepan and add in the dried fruit, orange and lemon zest and juice, butter, sugar and your chosen alcohol. Set over a medium heat and bring to a boil, then lower the heat and allow to simmer for 5 minutes. Tip the fruit mixture into a bowl and allow to cool for 30 minutes.
Preheat your oven to 150c / 130c Fan / Gas Mark 2 and line a deep 20cm cake tin with a double layer of baking parchment. Now wrap a double layer or newspaper around the outside of the tin and secure with string.
Pop the flour, ground almonds, baking powder, mixed spice, cinnamon, cloves, flaked almonds, eggs and vanilla into the bowl of a stand mixer along with the fruit mixture and mix well.
Tip into your prepared cake tin and bake in the centre of the oven for 2 hours. Remove the cake from the oven and prick all over with a wooden skewer. Spoon over 2tbsp of your chosen alcohol and leave to cool in the tin.
Once cool, remove from the tin and peel off the baking parchment. Wrap well in cling film, and feed with 2tbsp of your chosen alcohol every two weeks.
Stop feeding the cake with alcohol one week before you ice it, as this will allow time for the top of the cake to dry out.
It’s Bonfire Night! And what better treat to tuck into on a crisp, autumnal evening than a delicious toffee apple – perfect for nibbling on as you gaze in awe at the firework displays.
Ingredients
8 apples (preferably granny smiths)
400g golden caster sugar
1 tsp cider vinegar
4 tbsp golden syrup
Method
Pop the apples into a large bowl, and cover with boiling water to remove the waxy outer layer and help the caramel stick better. Remove from the water after a couple of minutes and dry thoroughly, then twist of any stalks and insert a wooden skewer into the apples.
Lay out some baking parchment and lay the apples on top. Tip the sugar into a saucepan along with 100ml of water and place over a medium heat. Cook gently for 5 minutes until the sugar has dissolved, then stir in the vinegar and the syrup. Place a sugar thermometer in the pan and cook to 150c. If you don’t have a thermometer you can test the toffee by pouring a little into a bowl of cold water. It should harden instantly and, when removed, be brittle and easy to break
Working quickly, turn and coat each apple in the toffee (letting any excess drip away) then return to the baking parchment to harden. Leave to cool completely before eating.
A spooky treat that the kids will love joining in and helping with this Halloween, these delicious biscuits also make a unique alternative to the usual trick-or-treat offerings!
Heat oven to 200C/180C fan/gas 6 and line a baking sheet with baking parchment.
Put the butter in a bowl and beat with electric beaters until soft and creamy. Beat in the sugar, then the egg and vanilla, and finally the flour to make a dough. If the dough feels a bit sticky add a little more flour and knead it in. Wrap in cling film and put in the fridge for half an hour.
Heavily flour a surface and cut the pastry in half. Roll out one half to 5mm thickness. Using a cookie cutter in the shape of a ghost (or any spooky shaped cutter you like), cut out 12 spooky shapes. Put the cut shapes on a baking tray lined with baking paper and put back in the fridge. Repeat with the second half of the pastry. Swap into the fridge, taking the chilled biscuits out.
Put these biscuits into the oven to bake for 10-12 mins, until pale but cooked through. Transfer to a wire rack to cool. Repeat with the other tray.
Once all the biscuits have cooled completely, they are ready to be assembled. Mix the icing sugar with 3 tbsp of water and mix well. It should be quite thick so add a little more icing sugar if the mixture is too runny.
Once the biscuits feel firm and the icing has set, use the sugar paste to decorate them as you please, rolling it out, cutting it to shape and topping the biscuits. You may have to use a little of the icing to glue it down. Decorate with icing pens if you like.
It’s finally here; the Bake Off final. We’ve seen many a talented baker come and go through the tent so far this year, leaving the absolute creme de la creme to reach the final. But who would beat them all to claim the Bake Off 2019 crown? Let’s find out!
For their last ever signature challenge, the bakers were asked to make a decadent chocolate cake. Sounds simple? Perhaps that’s why the judges picked such a classic bake; there’s no room for error. They were looking for absolute perfection. The bakers only had two hours to create their masterpieces.
Prue’s top tip : Chocolate cake; it sounds so simple. But we don’t want a bog-standard chocolate cake. What we want is something which is really chocolatey, really decadent, and absolutely astonishingly good flavour. And our course it’s got to be decorated to be worthy of winning the final.
It was anybody’s guess as to who would win the final. Steph had previously won four star baker accolades, and Alice had won two of them. David was the underdog, with no star baker under his belt, but he was determined to succeed. Steph decided to play it safe with a black forest gateau cake; Alice opted for a classic pear and chocolate combination; David opted for a boozy cake with plenty of Armagnac.
Paul’s top tip : I think using cocoa is a possibility but I’d like to see chocolate in there as well. The baking is integral in this, making sure it’s all beautiful on the outside as well as the in. It’s all about the timing, you’ve got to get it right, there is no room for error. Two hours is quite tight.
David used quite a lot of alcohol in his sponges, to the point where it overwhelmed other flavours. Alice absolutely massacred one of her sponges while she was trying to figure out whether it was cooked all the way through, which meant that the sponges didn’t sit properly when she put it all together. Paul wasn’t happy with the lack of actual chocolate, whereas Prue was more concerned about the presentation. Steph’s only criticism was that her cake was slightly overbaked. It was still hard to predict who was going to snatch the trophy at the end of the final.
Paul, in classic fashion, had picked another tricky technical challenge to test the bakers. The judges asked them to make six twice-baked Stilton souffles. These needed to hold their shape when taken out of the mould, and to be delicate and fluffy in texture. Each one had to be served with a thin lavosh cracker.
Paul’s top tip : I wanted something that was going to challenge them but also had a very classic feel to it. What we’re looking for are very proud, tall souffles with a gorgeous golden brown colour coming from the cream and parmesan.
David seemed to be well in his comfort zone – apart from admitting that he’d once used a housemate’s souffle dish as a plant pot because he’d had no idea what it was. Alice was perplexed with the roux, admitting she’d never made one.
Paul’s top tip : What you’ve got to remember when you’re making a souffle is whisking your egg whites. If you don’t whisk them enough, it’s not gonna carry the air. But if you overbeat it, you’re going to have a similar problem. Be delicate with that mixture.
The nation watched on in horror as Steph made the mistake of using cold water in her bain-marie instead of hot. All in all it was a stressful technical, which was befitting of the final. It was tense watching the bakers put the finishing touches to their souffles. Steph came in third place, followed by Alice, and David managed to snatch the first place spot.
After a tense technical, it was once again all to play for in the last showstopper. For the bakers’ final challenge, they were asked to make an illusion picnic to serve to their family and friends. This needed to consist of sweet treats disguised as savoury bakes, and vice versa. They also needed to make a nougatine basket to present their picnic in. Their feast needed to contain elements made from cake, enriched bread, and biscuit.
Paul’s top tip : The final challenge is all about deception. They could make a bread roll look like a pork pie, they could make a cake look like a banana. But it’s the final showstopper. It’s got to taste AND look fantastic.
Alice was upset at the news that her parents’ flight had been cancelled, but thankfully they were able to make it for the Bake Off carnival. The bakers were going all out in this final challenge to impress. They created some absolutely stunning illusion bakes that would make even a professional baker proud!
Prue’s top tip: All the techniques and all the decorations that the bakers have dealt with over the last ten weeks and sort of summed up in this one showstopper, and what we want is really good bread, really good cake, really good biscuits.
Things didn’t go to plan to for Steph; her cake was dry, and she started worrying that her macarons weren’t good enough. Poor Steph got upset at the end of the challenge, as she felt she didn’t do her best. Alice had done a wonderful job with her illusion picnic, however Prue felt that her bread lacked flavour. David presented a phenomenal cheeseboard, and thoroughly impressed the judges. So much so that he was crowned the winner for the 2019 Great British Bake Off!
Next year…
So Bake Off has finished for another year. We’re certainly going to miss it! Did you predict the winner? What were your favourite bakes? Perhaps the budding bakers among you will think about applying for season 11 of Bake Off! Let us know what you thought of the final on our Facebook page.
Easier to make than you might expect, this crème brûlée consists of a rich, vanilla custard topped with an irresistible layer of harden caramel. Perfect for your next dinner party.
Ingredients
250ml double cream
75ml milk
1 vanilla pod, seeds scraped out
4 eggs, yolks only
6 tbsp caster sugar
1 tsp vanilla extract
Method
Start by heating your oven to 140°C / 120°C fan / Gas Mark 1. Grab a saucepan and pour in the cream and milk, along with the vanilla pod, and bring to a boil.
Reduce the heat, cover and leave to stand and infuse for 10 minutes. Meanwhile, whisk together the egg yolks and 3 tbsp of the sugar until pale and thick. Add in the vanilla extract, then pour in the cream mixture. Stir everything together well, then divide the mixture between two ramekin dishes.
Place the ramekins in a bain-marie and bake for around 20 minutes, until just set. Remove from the oven and leave to cool.
Switch on your grill, then sprinkle the cold crème brûlée with a think layer of the remaining sugar. Slide under the grill caramelise, checking frequently until you have a golden topping. Leave to cool, and serve.
Sausages baked inside a giant Yorkshire pudding! No wonder toad in the hole is a traditional family favourite, and this recipe also contains an autumnal twist in the form of baked apples that adds a sweetness to the dish.
Ingredients
100g plain flour
1 egg, beaten
300ml milk
1 onion, sliced
1 apple, sliced
6 sausages
Method
Begin by combing the flour and a pinch of salt in the bowl of a stand mixer. Pour in the beaten egg, along with a splash of milk and beat gently with the whisk attachment, gradually adding more milk as you go.
Heat your oven to 220°C / 200°C fan / Gas Mark 7, and grease an ovenproof dish with a little oil. Lay the onion, apple and sausage in the tray and season. Pop the dish in the oven and cook for 10 minutes, until the apple and onion have softened.
Pour over the batter and cook for a further 30-40 minutes, until well-risen and golden.
It was the return of the classic pastry week last night in the Bake Off tent. Pastry has felled many a competent baker; who would rise to meet the challenge, and who would be left with a soggy bottom? Let’s find out!
For the first pastry challenge, the bakers were asked to make a tarte tatin. It could have any combination of flavours, however with a classic Bake Off twist it needed to be savoury, and it needed to use full or rough puff pastry. This needed to have good lamination, and be perfectly baked.
Paul’s top tip: What they’ve got to do is to create a savoury filling. They can use cheese, they can use onions, they can use mushrooms, they can use whatever they wish. But if they add too much liquid to the tarte tatin, it will soak down and really give it a soggy bottom.
All of the bakers opted to use rough puff pastry for their bakes. There were a lot of interesting flavour combinations from the bakers for this challenge, with everyone eager to earn their place in the semi-final next week.
Prue’s top tip: A classic tarte tatin is made with apples or pears. You put the pastry on the top of the frying pan and then you turn the whole thing out. The key to a perfect tarte tatin – savoury or sweet – is the caramelisation. You need that pie to look golden and delicious.
At the end of the first challenge, Henry and David had done really well. Poor Rosie and Alice fell victims to the infamous soggy bottom – something that bakers always strive to avoid – and Steph was somewhere in between with a good combination of flavours but too thin pastry.
Paul had picked another tricky technical for the bakers this week. The judges asked for the bakers to make a Moroccan pie using warka or brick pastry. Cue confused looks from most of the bakers – apart from David, who had heard of this one before. Perhaps this would be his chance to seize that elusive first place in the technical challenge!
Paul’s top tip: It’s a bit like making filo mince pies. You put layer on layer on layer, and build it up, then put your filling in it and fold the layers over the top. But it’s made with warka pastry, or brick pastry, and this is the difficult part.
Most of the bakers were flummoxed by their most recent challenge – apart from David, who seemed confident that he could master the unusual pastry. Steph became upset when her pastry evaporated off the hot plate, but she managed to tame it in order to present her pie. Poor Henry and Rosie both fell victim to their pies falling apart once cooked.
Paul’s top tip: Warka pastry is quite a loose batter; it’s basically made on a hot plate. You have to put it on the brush; if it’s too thin, as they’re brushing it on it will just disintegrate. If it’s too thick, it’ll act like a pancake and go splodge, and they’re not going to be able to push it around.
Surprisingly Henry came in last, followed by Steph. Alice came third, and somehow Rosie managed to secure second place for herself despite the fact her pie completely fell apart. Who knows? Maybe she sacrificed it to the pastry Gods. David came out on top – finally managing to secure that first place that has evaded him so far in the competition! As David said himself: “Finally got first place. It only took 8 tries.”
After the first two challenges, it was all to play for in the show stopper. It was impossible to predict who was in trouble! For the final pastry challenge, the bakers were asked to make a vertical pie. The judges wanted to see a large pie base with decoratively shaped pastry, arranged vertically supporting at least two further pies. Their fillings could be either savoury or sweet.
Paul’s top tip: What we mean by a vertical pie is we want a minimum of three pies stacked on top of each other. Whether it’s short crust or hot water crust, the choice of pastry is critical. The flavours have got to be there as well. Too much liquid in their filling can seep down. We want to be able to put the knife through and cut a wedge out and let it all hold its shape.
There were some ambitious bakes in the pastry pipeline! David sparked debate with his lidless pies, and earned a dubious look from Paul. All of the bakers went for some wonderful designs, varying between sweet and savoury flavour combinations. Rosie started stressing when her pies struggled to stack, declaring that she was the most likely to be sent home.
Prue’s top tip: The pastry needs to be thin enough to be delicious, and firm enough to hold the whole thing together.
Paul and Prue were very underwhelmed with the final challenge, as every single pie turned out to be really dry. Steph rose above them all once again to be crowned star baker, and unfortunately it was time for Henry to leave the Bake Off tent. It was tough to call after looking at all the bakes, however the judges felt that Henry was lagging behind the others in terms of skill.
Next week…
It’s the semi-final next week, so the bakers will have to pull out all the stops to be in with a chance of getting into the coveted final. We can’t wait to see all the delicious bakes they’ll come up with! Did the right person leave the tent this week? What did you think of the judges’ decisions? Let us know on our Facebook page!
Packed with flavour, this chicken & ham pie is the perfect family comfort food to tuck into.
Ingredients
6 chicken breasts, cut into cubes
3 carrots, chopped
3 potatoes, peeled and cubed
2 stalks of celery, chopped
2 tbsp fresh thyme, chopped
850ml chicken stock
50g butter
2 onions, chopped
50g plain flour
300ml milk
1 lemon, juice only
2 tbsp parsley, chopped
4 slices of ham, cut into thick strips
500g ready-to-roll shortcrust pastry
1 egg, beaten
Method
Take a large pan and throw in the chicken, carrots, potatoes, celery and half the thyme. Add in the chicken stock and bring everything to a boil, then reduce the heat, cover and cook gently for 15 minutes.
Place a colander over a large bowl, and pour in the pan contents. Remove the thyme, then reserve 600ml of the cooking stock.
Return the empty pan to the heat, and pop in the butter. Once melted, add the onions and cook until soft, then stir in the flour and a little stock at a time until you have a thick, smooth sauce. Pour in the milk and simmer for a couple of minutes. Remove from the heat and stir in the remaining thyme, lemon juice and parsley, then season to taste.
Mix together the chicken, vegetables and ham in an ovenproof dish. Pour over the sauce and leave to cool slightly. Preheat the oven to 200°C / 180° fan / Gas mark 6.
Roll out the pastry to around 5cm larger in circumference than the pie dish, and brush with the beaten egg. Lay gently on top of the pie mix, and press the edges to seal. Make a couple of small incisions in the centre to allow steam to escape, and bake for 25-30 minutes until golden.
We’ve taken this popular autumn drink and given it a new lease of life in cake form! Pumpkin spiced sponge covered in an espresso butter cream makes this one delicious treat.
Ingredients
For the cake:
210g plain flour
1 tsp baking powder
1 tsp pumpkin spice
60g unsalted butter, melted
4 tbsp vegetable oil
135g granulated sugar
150g light brown sugar
245g pumpkin puree
2 eggs
For the buttercream:
3 eggs, whites only
200g granulated sugar
340g unsalted butter
1.5 tbsp instant espresso powder
Method
Begin by preheating your oven to 180°C / 160°C fan / Gas Mark 4, then grease and line 2 x 20cm cake tins.
In a stand mixer, combine the flour, pumpkin spice, baking powder and salt.
Take a separate bowl and beat together the sugars, melted butter, oil, pumpkin puree and eggs. Now gradually pour this mixture into the dry ingredients, using the cake mixing attachment to beat everything together slowly.
Divide the batter between the cake tins and bake for around 35-40 minutes until a skewer comes out clean. Leave to cool in the pans for 10 minutes before transferring onto a wire rack to cool completely.
To make the buttercream, whisk together the egg whites and sugar until well combined. Place the bowl over a pan of hot water on the stove top and whisk continually until the mixture is no longer grainy.
Remove the bowl from the pan, and continue to whisk until you have a stiff meringue. Slowly beat in the cubed butter and mix until smooth, then mix in the espresso powder.
Sandwich the cakes together using a third of the buttercream, then use the rest to coat the rest of the cake. Decorate with fondant pumpkins, or any autumnal decorations that take your fancy.
It was another first in the Bake Off tent this week as we saw the bakers get stuck in with festival-themed bakes. There were some unusual challenges, but who would come out on top? And who would be the next baker to leave the tent? Let’s find out!
For the first challenge, the bakers were asked to make 24 yeasted festival buns. These needed to be buns that would be found during festivals such as Eid or Christmas, and the bakers needed to add their own twist.
Paul’s top tip: The bakers have got to produce 24 festival buns. They can represent any country in the world, they can have pretty much anything in as long as it’s related to a festival. But they’ve got to get them beautifully light, airy, full of flavour and pack a punch.
There were a lot of interesting flavour combinations in the bakers’ buns. Michael opted to put a lot of fruit in his, which got a concerned look from Paul. Most bakers went for classic hot cross buns, but Henry went for a tempting pastry instead.
Prue’s top tip: The most obvious festival bun to us is the hot cross bun at Easter. These buns have to be yeasted, but they could have spice in there, or other flavours. What I’m after is uniform, beautifully flavoured, beautifully textured, absolutely delicious buns.
Steph and Henry both earned handshakes this week – would Henry do enough to topple Steph from a potentially fourth star baker in a row? On the opposite end of the baking scales, poor Alice didn’t seem to do well with her blueberry and lemon flavoured buns.
Technical challenge: Cassatelle
Paul picked an intriguing festival delicacy for the technical challenge. Image source: The Great British Bake Off
Paul had chosen the technical challenge this week, and asked the bakers to make 12 Sicilian cassatelle. These are pastry crescents filled with a smooth and creamy ricotta, which is flavoured with chocolate and orange, and then fried until crispy and golden. They needed to be uniform in shape and size.
Paul’s top tip: These are basically Sicilian snacks that you’d have at a carnival. So inside these beautiful pastries we’ve got ricotta, chocolate, and orange in there as well. The hard bit is getting the pastry nice and thin and overall filling this properly with the ricotta. The other problem they’re going to have is obviously they’re going to fry it. If they don’t roll their pastry and it’s a bit thick, as soon as it hits the oil, chances are it’s going to burst open and the ricotta will pour out.
Both Michael and Alice had difficulty with their cassatelle bursting open. David once again missed out on the top spot in the technical, joking that he repels first place. He came second with Rosie beating everyone to come in first. Alice came last, followed by Michael in fifth place. After not doing as well as the others in the signature, this put them in danger of leaving the tent at the end of the weekend.
Show stopper challenge: Kek lapis Sarawak
The last baking challenge for our bakers was to make a ‘kek lapis Sarawak’. Confused? It’s a colourful cake which originates from the Sarawak region of Malaysia, and is often used in religious and cultural celebrations.
The judges wanted to see the bakers’ take on it; the cakes needed to display even and precise layers, and it needed to be grilled. Certainly an unusual way to make a cake! Once the cake had been grilled, the bakers needed to cut and reassemble it into intricate patterns that run through the whole cake.
Prue’s top tip: We’ve asked the bakers to do a Sarawak style layer cake. This has many, many layers in different colours and flavours. They put a thin layer of batter in a cake tin, grill it for a few minutes, take it out, add more batter, grill it, and add however many layers they want. Then, cut it into any shapes they like, then they reassemble those pieces of cake so that they make a fantastic pattern. It’s very difficult to do.
All of the bakers struggled with this unusual way of cake making. David had to scrap some of his layers, as did Rosie when they burned. Rosie opted for a more complicated pattern which didn’t quite pay off. Alice managed to save herself with her beautiful cake, and Henry earned himself the star baker title. Unfortunately it was time for the loveable Michael to leave the Bake Off tent.
Next week…
It’s the return of pastry week for next week’s episode, which is also the quarter-final! Did the right person get sent home? Or do you think someone else should have left the Bake Off tent? Let us know your thoughts over on our Facebook page.
After the dramatic double elimination last week, we wondered what Paul and Prue would have next in store for the bakers. This week was the classic dessert week! But how did the bakers get on? Let’s find out.
To start off dessert week, the bakers were asked to make a layered meringue cake. It needed to be a large cake with a minimum of three layers, sandwiched with a filling of their choice.
Paul’s top tip: We want the bakers to create a beautifully aesthetic meringue cake. You want definition, you want peaks, you want a bit of shape to your meringue, so when you look at it, you think, “Wow, I want to eat that.”
All the bakers went bold with their flavour combinations and choice of decoration.
Prue’s top tip: It seems quite simple, because they can all make meringue, they can all whip cream, they can all know about flavour. But the danger is because it’s simple, they will want to overcomplicate it.
Nearly all the bakers got a grilling from the judges, as they dove into the nuances of the meringue cakes. Henry was one of the only bakers to get mostly positive feedback.
Technical challenge: Verrines
Prue certainly tempted our tastebuds with these fruity verrines. Image source: The Great British Bake Off.
Prue had picked another fiendish technical for the bakers. For their technical challenge, the bakers were asked to make perfectly layered verrines; a layered dessert in a glass. It needed to consist of a mango compote, a creamy coconut panna cotta, a fresh raspberry jelly, topped with a coconut and lime streusel and a short sable biscuit.
Prue’s top tip: They could go wrong with not remembering to chill everything between each layer, and if you don’t get the measurements right, you won’t get the layers right.
All the bakers did really well considering how difficult the challenge they had been set was. At the end of the technical, Priya and Michael were in a precarious position as they came last and second to last. At the opposite end of the baking scales, David came in second, and Alice beat everyone to come out on top. It was all down to the show stopper challenge!
For their final challenge of the week, the judges asked the bakers to make a celebratory bombe dessert. It needed to be moulded into a semi-spherical or fully spherical shape; it needed to contain at least one baked element, and at least two other dessert elements such as ice cream or bavarois.
Paul’s top tip: It’s a little bit of luxury, a bombe. They’re probably going to build into a mould. The critical time is when they let it all out because you’re going to have so many different layers, so many different textures. They’ve all got to be set at the same time. If one layer collapses, the probability of all of them collapsing is very, very high.
It was nailbiting to watch all the bakers trying to put their bombes together, but they all managed to finish in time. There was a mixed response to the bakers’ creations, but at the end of the weekend it was time for Priya to leave the tent. Unsurprisingly, Steph succeeded in being crowned star baker for the third week in a row!
Next week…
It looks like next week the bakers will be diving into festive bakes with festival week! What did you think of their creative desserts? Did the right person leave the Bake Off tent? Let us know your thoughts over on our Facebook page!
Looking for a show-stopping dessert? Filled with fresh strawberries and whipped cream. this pavlova cake is guaranteed to put the wow-factor into your next dinner party!
Ingredients
9 eggs, whites only
600g caster sugar
1 tbsp cornflour
1 tbsp white wine vinegar
400ml double cream
75g icing sugar
2 tsp vanilla extract
250g strawberries
Method
Begin by heating your oven to 120°C / 100°C Fan / Gas Mark 1/2. Take three sheets of baking parchment and draw circle on each; one 20cm, one 16cm and one 12cm in circumference. Put the baking paper on baking sheets, with the penned-on side down.
Pop your egg whites in a stand mixer and whisk until stiff peaks being to form. Slowly and gradually add in the sugar, continually whisking, until you have stiff, glossy peaks. Then whisk in the cornflour and vinegar.
Spoon the mixture onto the baking parchment, filling each circle, and smooth the top over but leave the edges rough. Bake in the oven for 30 minutes, then reduce the heat to 100°C / 80°C / Gas Mark 1/4, and continue to bake for a further 90 minutes. Allow to cool in the oven, then remove from the parchment.
Whip the cream together with the icing sugar and vanilla extract, then fold in the strawberries (reserving a few for decoration). Assemble by laying the largest meringue on a cake stand, then top with the cream and strawberry mix. Place the middle sized meringue on top, and repeat the layering process with the smallest sized meringue. Top with cream and the reserved strawberries.
Is there anything better than salted caramel? No, we don’t think so either. This easy-to-make sauce is perfect drizzled over cake, ice cream, apple pie – anything really! Give it a go and see for yourself.
Ingredients
75g unsalted butter
50g soft light brown sugar
50g caster sugar
50g golden syrup
125ml double cream
1 tsp sea salt flakes (you may want to add more depending on your personal preference for saltiness!)
Method
Melt together the butter, sugars and syrup in saucepan and let everything simmer together for about 3 minutes, swirling the pan ocassionally.
Pour in the cream along with half a teaspoon of salt flakes, and give everything a stir. Taste for salt levels (carefully, as it will be hot) and add more if required.
An added kick of espresso brings a new level of indulgence to this classic dessert, which will soon become a new found favourite amongst coffee lovers!
Ingredients
For the profiteroles:
100g plain flour
85g unsalted butter
3 eggs, beaten
For the filling:
4 tbsp custard powder
6 tbsp golden caster sugar
600ml milk
2 tbsp espresso powder, dissolved in hot water
284ml pot of double cream
100g icing sugar
For the sauce:
100g dark chocolate
50g unsalted butter
50ml espresso
2 tbsp kahlua
Method
Sift the flour into a bowl and add mix in a pinch of salt. Take a saucepan and add 200ml of cold water along with the butter and bring to a rolling boil. Remove the pan from the heat and tip in the flour, and beat the mixture until it begins to come away from the sides of the pan. Tip onto a plate, and leave to cool.
Heat your oven to 200°C / 180°C Fan / Gas Mark 6. Return the paste to the saucepan and gradually add the eggs, beating continually. Once everything is well incorporated, spoon small balls of the mixture onto a lined baking sheet, and pop in the oven for 20-25 minutes until golden.
Remove from the oven and poke the undersides with a teaspoon. Turn them upside down, and return to the oven for a further 5 minutes. Transfer to a wire rack and leave to cool completely.
To make the filling, mix the custard powder and caster sugar with a splash of milk until you have a smooth paste. Heat the remaining milk, then stir that into the paste. Pour the mixture into a pan and bring to the boil. Cook for 5 minutes, stirring occasionally, until you have a thick custard.
Now stir in the coffee and leave to cool. Softly whip the cream, sifting in the icing sugar, the fold into the custard. Pipe into each choux profiterole.
For the sauce, melt the chocolate and the butter with the espresso in a microwave-proof bowl, in 30 seconds bursts. Mix in the kahlua, then pour over the filled buns.
The bakers were back in the tent this week to celebrate everything about the 1920s. What delightful treats would we discover? Who would rise to the challenge, and who would sink like a sad soufflé? Let’s find out!
To start off 1920s week, the bakers were asked to make four individual highly decorative custard pies. These needed to be open-topped and the custard had to set during baking.
Paul’s top tip: With shortcrust pastry you want it to melt in the mouth and that’s the critical thing. Overwork it, it makes it too rubbery. So the best thing to do with the pastry is just bring it together, chill it down. I want to see a beautifully-formed custard pie, silky smooth, but it must contain a theme of the 1920s.
Rosie had a bit of a disaster when she accidentally knocked one of her tarts to the floor, and her decorations didn’t quite go to plan. On the opposite end of the spectrum, David earned the second Paul Hollywood handshake for his vanilla custard tarts! It was an even playing field at the end of the first challenge, so the bakers got ready for the technical.
Technical challenge: Beignets soufflé with sabayon
Prue had chosen another fiendishly difficult technical for the bakers. They were asked to make 18 beignets soufflés. Confused? A beignet soufflé is a fried choux ball filled with a strawberry jam. It needed to be crispy on the outside and light and fluffy on the inside, uniform in size and shape and served with a sabayon.
Prue’s top tip: The most difficult thing is how you’re going to get it into perfect balls and drop it into the fat. I think the best way to do it is with two spoons. Try to create a quenelle, but get it round rather than quenelle shaped. Inside we expect to see lots of air and some soft, almost stretchy, dough.
Everyone seemed to struggle with this technical. Michael got emotional when he couldn’t get his pastry mixture to work properly, but managed to pull it together to present his beignets soufflés. At the end of the technical, Helena came out on top, and surprisingly David came in last place. It was all hinging on the last challenge as to who would have to leave the Bake Off tent.
Show stopper challenge: Prohibition-era inspired cocktail cake
The last challenge of the week for our bakers was to create a prohibition-era cocktail cake. Prohibition was the time when alcohol was banned in America, and was sold only by gangsters like Al Capone.
Paul’s top tip: We’ve given the bakers four hours to produce this Prohibition cake so you’ve got to think backwards. How long is it going to take to decorate the cake? Allow yourself at least an hour, maybe more. Your sponges should be in and out of the oven within the hour and that gives you plenty of time to produce real baking magic.
Paul and Prue wanted a 1920s-themed two-tier cake. The flavour needed to be based on the bakers’ favourite cocktails and the design needed to be a visual spectacle that was typical of the era.
Prue’s top tip: I want three things. I want a wonderful design, a delicious cake, and it will taste of a recognisable cocktail.
Even at the end of the last challenge, it was still hard to say for certain who would be going home this week. The judges decided it was the end of the road for two bakers, and in what we certainly thought was a shock elimination the delightful Helena and Michelle were chosen to go home. Steph was once again crowned star baker for the second week in a row!
Next week…
It’s dessert week next week! We can’t wait to see what tasty creations the remaining bakers will come up with. What did you think of 1920s week? Let us know over on our Facebook page!
An added adult twist to a family favourite, this indulgent tiramisu is made using espresso, kahlua and vodka. A real show-stopper for any dinner party!
Ingredients
400ml strong black coffee
2 tsp brown sugar
4 tbsp vodka
4 tbsp kahlua
500g mascarpone
600ml double cream
3 tbsp icing sugar
1 tbsp vanilla paste
2 tbsp espresso powder
300g sponge fingers
50g dark chocolate
Method
Take a bowl and mix together the black coffee, brown sugar, vodka and 3 tbsp of the kahlua, then set to one side.
In a separate bowl, mix up the mascarpone for a couple minutes, then beat in the double cream, icing sugar and vanilla paste until you have soft peaks. Tip out 1/3 of the cream into another bowl, then mix the coffee powder with the rest of the kahlua and stir in to make a coffee cream.
Dip the sponge fingers into the vodka-coffee mixture, then lay a single layer in the base of a large, serving dish. Spoon over 1/2 of the plain cream, then grate over a good layer of the dark chocolate. Add another layer of coffee-vodka dipper fingers, then spoon over the coffee cream and grate another generous layer or chocolate on top. Add another layer of soaked fingers, top with the rest of the plain cream and finish with a final grating of chocolate.
Chill until ready to serve (for at least 4 hours) and dust with cocoa powder to finish.
We’re three bakers down, and back for another week in the Bake Off tent. This week was another first for the Bake Off; dairy week! Who would rise as the cream of the crop, and who would curdle in the wake of the challenges? Let’s find out!
The bakers’ first challenge was to create a dairy cake. The cake mixture needed to contain a cultured dairy product, such as buttermilk or yoghurt. The aim was to create a moist sponge, though as Sandi reminded us they needed to be careful. Too much moisture and the cake would become prone to tearing.
Paul’s top tip: This week we want them to celebrate dairy. More to the point we want to bring in a cultured milk; buttermilk, a yoghurt. Where they’ve got to be careful is by adding cultures they may over bake it; it might dry the cake out and it will almost be like cardboard.
Unfortunately Michael’s cake tore as he tried to remove it from the mould. He tried to rescue it, but it didn’t go unnoticed by the judges. Phil was the only other baker to be in trouble at the end of the first challenge, after Paul said his cake lacked flavour.
Prue set the bakers the unusual challenge of recreating a favourite treat of Henry VIII; 12 maids of honour. They needed to have a flaky rough puff pastry case, one layer of lemon curd, a silky smooth well-risen cheese curd filling and topped with a Tudor rose.
Prue’s top tip: I want to see the layers of pastry. And you don’t need to bake it blind or you’ll get a soggy bottom!
The technical proved to be disastrous for most of our bakers. Helena made the wrong pastry, Priya encountered several issues, but it all became apparent when the judges appeared and commented that none of them were up to the standard they had expected.
Steph came first with David in second, and Priya came last. At the end of the technical, it looked like Michael and Priya were in trouble.
After the first two challenges, there was a lot riding on the show stopper to rescue our bakers. Their final challenge was to create a stunning display of milk-based Indian sweets known as mishti. Their display needed to contain three different types of mishti, with twelve portions of each type.
Paul’s top tip: This show stopper is going to be fascinating. The Indian sweets are all about vibrancy, it’s about colour. They are used at birthdays, weddings predominantly, and we want that vibrancy; it’s that sense of celebration.
A lot of the bakers went all out in an attempt to impress. Priya was determined to save herself after the disastrous technical challenge, as was Michael. Henry proved to be too ambitious, as his ice cream-based treat didn’t set in time. It was so close between who would be next to leave the Bake Off tent, with Paul and Prue hinting that two bakers could be up for the chop.
Steph pipped David to the post to be crowned star baker, and in the end it was time for Phil to leave the tent, which came as a shock to us as well as him. Paul and Prue decided that his show stopper was pretty basic in comparison to everyone else’s, which meant that Michael and Priya were safe to bake another day!
Next week…
Next week, the bakers face a celebration of the roaring twenties. What interesting bakes will we see? Let us know what you thought of dairy week over on our Facebook page!
Moist, light and studded with an abundance of fresh blueberries, this cake is perfect for any bake sale or simply as a midweek treat that all the family will love.
Ingredients
175g Greek yoghurt
200g caster sugar
3 eggs
1/2 tsp vanilla extract
80ml olive oil
200g self-raising flour
150g fresh blueberries
Method
Preheat your oven to 180°c / 160°c Fan / Gas Mark 4, then grease and flour a loaf tin.
Grab a stand mixer and mix together the yoghurt, eggs, vanilla extract and olive oil. Once combined, gradually add in the flour along with a pinch of salt, and mix until combined.
Gently fold in the blueberries and transfer to your loaf tin.
Bake for around 60 minutes, until golden on the top. Check if the cake is cooked by inserting a clean skewer into the centre – if it comes out clean, then you’re good to go!
Apples and blackberries are both in season at the moment, and they make the perfect pairing in this quintessential British dessert.
Ingredients
For the crumble topping:
120g plain flour
60g caster sugar
60g unsalted butter, cut into cubes
For the filling:
300g apples, cored, peeled and cut into chunks
30g unsalted butter
30g demerara sugar
115g blackberries
1/4 tsp ground cinnamon
Method
Start by preheating your oven to 190°c / 170°c Fan / Gas Mark 5. Combine the flour and caster sugar in a large bowl, then rub in the butter using your fingertips until you have a light, sandy texture.
Sprinkle the mixture over a baking sheet, and bake for 15 minutes until lightly coloured.
Whilst your crumble topping is cooking, melt the demarara sugar and the butter together in a saucepan and cook for around 3 minutes until you have a light caramel.
Tip in the apples and cook for 3 minutes, then add the blackberries and cinnamon, and cook for a further 3 minutes. Cover, remove from the heat, and leave to stand.
Spoon the filling into an oven-proof dish, top with the crumble and bake for 10 minutes. Serve with vanilla ice cream.
This classic American pastry is surprisingly easy to make, and make the perfect addition to any brunch.
Ingredients
For the dough:
350g self-raising flour
tbsp granulated sugar
1 tsp cinnamon
1 tsp salt
200ml milk
100g butter, melted
2 eggs, yolks only
For the filling:
60g brown sugar
2 tbsp granulated sugar
1 tsp cinnamon
2 tbsp butter, melted
100g icing sugar
Method
Begin by preheating your oven to 180°C / 160°C Fan / Gas Mark 5. In a stand mixer bowl, combine the flour, salt, sugar and cinnamon.
In a separate bowl, mix together the egg yolks, butter and mix until well combined, then pour this into the flour mix (whilst beating) until a dough has formed.
Mix together all filling ingredients, aside from the icing sugar, in a small bowl. Roll out the dough on a lightly floured surface until it is about the size of a piece of paper.
Spread the filling out evenly on top of the dough, then roll up tightly and cut into 8 equal rolls and arrange in an oven dish so that they are tightly packed in together. Bake for 35 minutes.
Remove from the oven and allow to cool. Mix the icing sugar with water until it reaches your desired consistency, and drizzle over the top.
The unconventional addition of avocado not only creates a super creamy texture, but also makes this mousse dairy free! Extra sweetness is brought in from maple syrup and vanilla to make this mousse intensely chocolately.
Ingredients
100g dark chocolate
4 tbsp maple syrup
2 tsp vanilla extract
5 tbsp almond milk
2.5 tbsp cocoa powder
2 ripe avocados, flesh only
Method
Melt the chocolate in a bowl set over a saucepan of simmering water. Once melted, remove from the heat and stir in the maple syrup, vanilla extract and almond milk, along with 1/4 tsp of sea salt and cocoa.
Take a blender or food processor and whizz together the chocolate mix with the avocados until you have a silky, smooth mixture. Divide the mixture between six ramekins or glasses and chill for at least three hours, up to twelve.
The baker’s dozen is over and we are left with 12 talented bakers, who this week, faced crunch time (pun fully intended) as they took on the perils of biscuit week.
The show kicked off with this week’s signature challenge; decorated chocolate biscuit bars, and we really got to see the contestants’ imaginations come in to play. Helena’s ‘Witches Fingers’ were a halloween-themed highlight, albeit not to the judges’ taste, but it was Michelle’s bakewell-themed biscuits that won over Paul and Prue, with Rosie and Alice following closely behind with their virgin mojito biscuit bars and honeycomb mallow peanut bars.
And what can we say about poor Jamie who, having narrowly survived last week, doesn’t seem to be any stronger in the initial biscuit week challenge.
Technical Challenge: Fig Rolls
So, onto the technical challenge of fig rolls. A tricky one, and certainly not a biscuit you’d ever really think to make yourself at home, the bakers are asked to produce 12 of the biscuits, identical in shape and size. Noel forgets to mention this fact at the delivery of the challenge, and so Sandi swoops in to elaborate, reminding us that this initially unlikely duo are actually a match made in TV heaven.
In true bake-off fashion, the instructions are minimal, and the usual flustering occurs. Helena manages to make 11 fig rolls instead of 12 but, true to her gothic personality, draws the missing one on in chalk with “RIP” written as if it was a biscuity crime scene. Jamie, for some reason, decides to egg-wash his biscuits. The pair are placed 12th and 11th respectively, with Alice coming out on top and securing her place as ‘one to watch’ this week.
3D biscuit constructions are the order of the day when it comes to the show-stopper challenge. The old Bake-Off adage of ‘style over substance’ is warned from the off, as the bakers are reminded that their showstoppers, no matter how impressive, should not compromise any loss of flavour or texture.
Rosie sets herself the mammoth task of baking 212 biscuits for her chicken, while Henry sets to work building an organ – opening us up for some good old-fashioned Bake Off innuendos. Jamie proposes to make a guitar and you can hear a collective sigh/gasp from the entire nation as it falls apart when removed from the oven. Helena manages to save herself with an impressive spider hatching from an egg, complete with a spun-sugar web.
Unsurprisingly, yet well deserved, Star Baker goes to Alice this week, who has stepped up to the plate and really shown us what she can do. Even more unsurprising, perhaps, is the inevitable demise of Jamie who is sent home. We’ll miss his cheeky, youthful personality, and we’re certain he’ll be off to fine tune those baking skills even further.
Next week…
It’s the week all the bakers dread, and all the viewers love – bread week! Bread guru, Paul Hollywood, will undoubtedly be on the prowl for the perfect loaf and judging from the trailers, there are some amazing creations for him to sample. Yes, we are jealous. Let us know your thoughts on last night’s episode over on our Facebook page!
If you’re feeling inspired by last night’s episode of The Great British Bake Off, and fancy giving the technical challenge of fig rolls a go yourself, this recipe will guide you through step by step.
Ingredients
115g plain flour
115g wholemeal flour
150g unsalted butter, cut into chunks
65g light muscavado sugar
1 tsp vanilla extract
2 eggs, yolks only
250g dried figs, finely chopped
2 tbsp lemon juice
Method
Combine both of the flours in a large bowl, then rub in the butter using your fingertips until you have a mixture that resembles fine breadcrumbs.
Add in the sugar, vanilla extract and egg yolks, then mix to form a firm dough, adding water in 1 tbsp at a time if necessary. Wrap in cling film and chill in the fridge for 30 minutes.
Take a small saucepan add tip in the figs, along with 6 tbsp of water. Bring to the boil, then reduce the heat. Cover and gently simmer for 5 minutes, until the figs have plumped up and the water has been absorbed. Transfer to a bowl and lightly mash with a fork. Add in the lemon juice, stir well and leave to cool.
Preheat your oven to 190°C / 170°C Fan / Gas Mark 5, and roll the dough out on a lightly floured surface until you have rectangle about 50cm x 15cm. Cut the dough in half lengthways to make to strips.
Spoon half of the fig puree along the centre of each strip, then bring the opposite long side up and over the filling to form a ‘log’ shape. Press the edges together to seal.
Flatten each of the logs slightly then, using a sharp knife, cut each log into 10 biscuits and transfer to a greased baking sheet. Prick each biscuit with a fork, and bake for 12-15 minutes until slightly dark in colour. Transfer to a wire rack and leave to cool completely.
It’s that time of year! ‘The Great British Bake Off’ is back on our screens once again, tempting our tastebuds with all of the bakers’ delicacies. This year there are 13 bakers in the Bake Off tent all vying for the esteemed title of star baker.
The first week’s challenge was cake; a classic baking feat, are you much of a baker if you can’t bake a decent cake? Let’s find out!
The bakers got stuck in straight away with the first challenge – to create their signature fruit cake for the judges. This had to have a significant amount of fruit, and needed to be beautifully decorated.
Paul’s top tip: The fruit cake for me is one of those basics of baking. Pick a great sponge base, fill it with fruit. But it’s about the consistency of the batter; too thin, all the fruit will drop down to the bottom, too thick, they all stay at the top. Get the balance right and it will bake beautifully.
A lot of the bakers went for classic family recipes. All of the bakes had fantastic favours which made our mouths water! Though we did want to take the knives away from Michael after he repeatedly injured himself when trying to chop up the fruit. Dan decided to change his recipe at the last minute to create a much bigger cake than he had practiced with – a very risky strategy, which unfortunately didn’t pay off.
Prue’s top tip: They’ve only got two and a half hours so they have to get those cakes into the oven, out of the oven, and get it cool because we want it decorated as well, and there’s a real danger that they’ll be putting icing onto a hot cake and it will just melt.
For their fruit cakes, there was a lot of inspiration from classic holiday recipes. Christmas, Easter, and even Halloween made a feature with Helena’s cake of choice. Poor Henry suffered a mishap when his royal icing house decoration crashed to the tabletop, but the flavours of his fruit cake rescued him.
At the end of the first challenge, Dan was in trouble after his fruit cake turned out to be raw. Most of the bakers did really well and impressed with their flavours. It was a fairly even playing field, which was soon to be put to the real test by the first technical challenge…
For their first technical challenge, the bakers were asked to make six identical angel cake slices, each made of three layers of genoise sponge, and each cake sandwiched between layers of Italian meringue buttercream. The angel cake slices needed to be topped with icing, which needed to be feathered.
Prue’s top tip: It sounds simple enough, but the point is it’s a genoise sponge and it’s really easy for that mixture to become flat. If they overmix, it’s not just volume they lose, the texture becomes rubbery. It has to be light!
The bakers were all given the same ingredients along with Prue’s 15 stage recipe. Some of them got into difficulties straight away; Jamie had lost all the air from his sponges, which is never a good start. Dan was hoping for this technical to save him after the disastrous first challenge.
Jamie came last, but we did love Jamie’s polite “Thank you,” to Prue’s honest “It’s just awful.” Henry came out on top in the technical challenge, which is a wonderful achievement to have under his belt so early on in the series.
Show stopper challenge: Birthday cake you dreamt of as a child
The last challenge of the weekend was to create the ultimate birthday cake that they dreamt of as a child. The bakers were given free reign over flavours and decorations, with the only requirement that it be a spectacular show stopper.
Paul’s top tip: Time will be their enemy. It’s about colour, it’s about detail, it’s about wow. They’ve got to show us what they can do.
There were fairy themes, pirate themes, an even a schnauzer made an appearance. Though Jamie wasn’t off to great start when he forgot to add his eggs…
Prue’s top tip: I’m rather hoping for some originality. Children dream a lot; I want them to try to remember what they dreamt about. But as always, what matters far more than anything is the quality of the cake. The flavours should be real and punchy it has to be delicious.
Bakers had to make plenty of cake to make those show stopper sponges, as well as think about how to support their ambitious bakes. Once their bakes were in the oven it was time to focus on all those decorations!
All of the bakers created some pretty impressive bakes which made our mouths water. Michelle’s Ty Tylwyth Teg (that’s ‘fairy house’ in Welsh) shone out from the crowd – a carrot cake with orange cream cheese frosting which prompted Prue to ask for the recipe, and earned her the star baker apron for the first week. Da iawn, Michelle!
At the end of the weekend, it was down to Dan or Jamie as to who was going to be first to leave the Bake Off tent. It’s always sad to say goodbye to one of the bakers, especially in the first week when we’d still like to get to know them all better, but unfortunately the first Bake Off casualty was Dan.
Next week…
It’s biscuit week next week! There looks to be another variety of challenges for our bakers to face, and we can’t wait to see who’ll come out on top. Do you have a favourite baker yet? Do you think the right person went? We want to hear what you think over on our Facebook page!
A classic flavour combination, this recipe is definitely for the more adventurous of you who want to try something a little different. It’s the perfect cake for satisfying your sweet tooth!
Ingredients
200g caster sugar
200g self-raising flour
200g butter
200g white chocolate, chopped
200g raspberries; fresh or frozen
4 large eggs, beaten
For the buttercream
200g icing sugar
100g butter
For the topping:
200g white chocolate, chopped
200g raspberries, to decorate
Method
Preheat the oven to 180 degrees Celcius/ gas mark 4. Grease two cake tins, and set to one side.
Put the flour and sugar together in a mixing bowl, then combine together. Add the butter and beat into the dry ingredients. Add the eggs, and mix until well combined. Next, add the chopped chocolate and stir in with a spoon. The raspberries will add a lovely splash of colour to the mixture – you can use fresh fruit, but its frozen equivalent will work just as well. Frozen raspberries will add extra water content to the cake, so you may need to bake it for slightly longer – make sure to cover the tins with tin foil to stop your sponges from burning if you use this alternative method.
Divide the mixture equally between the two prepared tins, then chuck these in the oven for around 20-25 mins, or until golden and springy to the touch. If you use the clean knife method to test if your sponge is cooked, make sure to remember the white chocolate may try and trick you into thinking your cake needs longer than it does.
While you’re waiting for your delicious treat to cook, you can prepare the buttercream. Add the icing sugar and butter together and beat until smooth.
Once satisfied your sponges have had long enough to be cooked to perfection, take them out of the oven and leave them to cool in the tin for a few minutes. Don’t be tempted to take them out of the tin too soon, as the sponges may fall apart. Turn out onto a wire cooling rack so they can cool down quicker before you add the buttercream between the two layers, as well as on top of the cake.
Now for the added decadence! Add the last of your chopped chocolate to a glass bowl. On the hob, boil some water in the bottom of a saucepan and place the bowl with your chocolate on top of it. Don’t let the water touch the bottom of the bowl or otherwise it could cause the chocolate to turn nasty and unusable. Stir with a wooden spoon, and then once all the chocolate has melted, pour it over the top of your cake. Make sure the buttercream is well covered. Before the chocolate has time to set, take those fresh raspberries and add them to the top of your cake for a beautiful splash of colour. Serve with some double cream for added decadence.
A flaky, crisp pie crust adorned with juicy peaches. This is so simple to make, and one that the kids will enjoy getting involved with too!
Ingredients
300g plain flour + 2 tbsp extra
6 tbsp caster sugar
1 tsp salt
225g butter, cold, sliced
120ml cold water
750g fresh peaches, peeled, stoned and sliced
1 tsp vanilla extract
30g almond paste
Method
Blend together 300g of the flour, 2 tbsp sugar and the salt in a food processor, then add in the butter and pulse in short bursts until you have a crumbly mixture. Add in the water and quickly process, adding more water if necessary, until you have a soft dough. Form into a ball, wrap with cling film and refrigerate for 1 hour.
Toss the peaches with the vanilla and a sugar in a bowl, then gently stir in the extra 2 tbsp of flour.
Preheat your oven to 220°C / 200°C Fan / Gas Mark 7, and line a baking tray with parchment. Flour a surface and roll out 1/2 of the pastry to a thickness of around 3mm. Spread the almond paste in a small circle in the centre, then mound up half of the peaches on top. Fold the outer edges of the pastry round over the filling by about 7cm, then transfer to your baking tray. Repeat with the remaining ingredients so that you have two galletes.
Bake for 30 minutes until golden, and allow to cool completely before serving.
The perfect accompaniment to any dessert, this classic, gloriously green ice cream is a favourite among adults and children alike. Using an ice cream machine makes this an absolute doddle, and means you get your ice cream sooner too!
Ingredients
100g pistachios, shelled
150ml milk
100g golden caster sugar
300ml double cream
300ml ready-made custard
1/2 tsp almond extract
Method
Tip 3/4 of the pistachios into a food processor or spice grinder and blitz into fine dust. Add these into a pan along with the milk and sugar, and gently bring to the boil whilst stirring. Remove from the heat, leave to cool completely, then chill in the fridge.
Finely chop the reserved pistachios and whip the cream to soft peaks. Fold in the custard and almond extract until everything is evenly mixed. Pour into an ice cream machine.
Chocolate and raspberries are one of those culinary matches made in food heaven, so it only made sense to combine them in a delicious, gooey, moreish brownie.
Ingredients
200g dark chocolate
100g milk chocolate
250g salted butter
400g soft light brown sugar
4 eggs
140g plain flour
50g cocoa powder
200g raspberries
Method
Start by heating your oven to 180°C / 160°C Fan / Gas Mark 4 and line a 20 x 30cm baking tray with baking parchment.
Tip the chocolate, butter and sugar into a pan and gently melt, stirring occasionally. Once melted and combined, remove from the heat.
One at time, stir the eggs into the chocolate mixture, then sieve in the flour and cocoa and stir everything together.
Mix in half the raspberries, then transfer the mixture to the lined tray. Scatter over the remaining raspberries and bake on the middle shelf for 30 minutes. Allow to cool before slicing into squares.
A delicious South American pastry, these empanadas can either be baked or fried and are perfect for a late summer picnic or garden party.
Ingredients
For the pastry
375g plain flour
22g butter, cubed
2 eggs
For the filling
100g chorizo sausage
300g beef mince
1 onion, chopped
Handful of coriander, chopped
Handful of parsley, chopped
2 tsp smoked paprika
2 tsp ground cumin
1 tsp chilli flakes
2 tbsp tomato puree
Method
Using your fingertips, rub the butter and the flour together with a pinch of salt until you have a crumbly mixture. Beat the eggs in a separate bowl, then add to the pastry mix along with 100ml of cold water. Bring everything together to form a dough, then turn out on a lightly floured surface and knead until smooth. Cover with cling film then place the in the fridge for 20 minutes.
In the meantime, make the filling. Remove the chorizo from its casing and add to a mixing bowl with the mince, onion, coriander, parsley, paprika, cumin and chilli flakes. Mix well, then tip out into a frying pan and cook over a medium heat for 2 minutes. Stir in the tomato puree and cook for a further 7-10 minutes until everything is cooked through. Remove from the heat and allow to cool.
Heat your oven to 180°C / 160°C Fan / Gas Mark 4. Remove the dough from the fridge and divide into four portions, then roll out each one into a thin sheet. Using a 10cm biscuit cutter, cut out discs then place 1 tsp of the chorizo filling in the centre of each disc. Wet the edges of the pastry, and pinch both sides up and fold in half to seal. Crimp the edges using a fork.
Lay out on a baking tray then brush the tops with a beaten egg. Bake for 20 minutes, remove from the oven and cool for 5 minutes before serving.
This classic, French style dessert with a crumbly pastry case and refreshingly tangy lemon filling the perfect show stopping dinner party dessert, or can simply be enjoyed as an afternoon treat!
Ingredients
For the pastry
500g plain flour
140g icing sugar
250g unsalted butter
4 eggs, yolks only
For the filling
5 eggs
140g caster sugar
150ml double cream
3 lemons, zested and juiced
Method
Begin by making the pasty. Mix the flour and icing sugar in a bowl, then rub the butter in with your fingers until you have a crumbly mixture. Mix in the egg yolks, adding a couple of tablespoons of water if the mixture seems a little dry, until everything comes together.
Roll into a ball and divide into two halves. Pop one half in the freezer, and you’ve got it ready to go for another tart! Flatten the other half down with your hands, wrap in cling film, and chill for at least 30 minutes.
While the pastry is chilling, make the filling by beating all the ingredients (aside from the lemon zest) together. Strain the mixture through sieve, then gently stir in the zest.
Roll the pastry out on a lightly floured surface, then lift into a 23cm tart tin. Press down gently on the bottom and the sides, then trim off any excess pastry. Prick the base all over with a fork, then put in the fridge for half an hour.
Heat your oven to 160°C / 140°C Fan / Gas Mark 3. Line the tart with foil and fill with baking beans. Blind bake for 10 minutes, then remove from the oven, throw away the foil, and bake for a further 20 minutes.
When the pastry is ready, remove it from the oven and pour in the lemon filling. Bake for 30-35 minutes until just set, then leave to cool in the tin. Serve at room temperature or chilled.
Sumptuously dark and decadent, this mousse is the perfect sophisticated dessert for any dinner party, or simply just for well-earned end of the week treat.
Ingredients
85g dark chocolate, at least 70% cocoa solids
1 tbsp cocoa powder, plus extra for dusting
1/2 tsp instant espresso powder
1/2 tsp vanilla extract
2 eggs, whites only
1 tbsp golden caster sugar
50g Greek yoghurt
Handful of nuts, to decorate
Method
Finely chop the chocolate and place it in a bowl that will fit over a pan of gently simmering water. Add the cocoa, coffee and vanilla along with 2 tbsp of water, then place the bowl gently over the pan of simmering water, stirring frequently until melted, then remove from the heat.
Add 2 tbsp of boiling water to the melted chocolate to help it thin down, and set to one side.
Whisk the egg whites to fairly soft peaks, then whisk in the sugar until you have a thick, glossy mixture.
Beat the yoghurt into the melted chocolate, then fold about one-third of the egg whites into the chocolate mix using a metal spoon. Once incorporated, gently mix in the remaining egg whites, taking care not to over mix.
Spoon into 4 small ramekins or tumblers and chill in the fridge for at least two hours, but preferably over night.
When the time comes to serve, chop the nuts and scatter over the top.
A huge culinary trend at the moment, matcha powder (made from ground green tea leaves) paired with spinach gives these pancakes that vibrant green glow that will certainly brighten up your breakfast!
Ingredients
2 tsp matcha powder
60g spinach
100ml milk
200g self-raising flour
1 tsp baking powder
2 tbsp maple syrup
1/2 tsp vanilla extract
3 eggs
25g butter, melted
4 tbsp natural yoghurt
Method
Grab a blender and pop in the matcha powder, spinach and milk. Whizz into a smooth mix, then pour into a large bowl with the rest of the pancake ingredients and whisk until any lumps have gone.
Melt a small knob of the butter in a large, non-stick frying pan then drop in roughly 2tbsp of pancake mix for each pancake. Cook for 2-3 minutes on each side (you’ll see when they are ready to flip as bubbles start to form on the surface).
Serve topped with the natural yoghurt and your choice of fruit topping!
Also known as ‘window cake’, batternberg is a delicious, marzipan coated sponge that is the perfect addition at any summer picnic or afternoon tea. This recipe makes two batterberg cakes, so you can either store one or give one away to a lucky friend!
Ingredients
For the almond sponge:
175g butter
175g golden caster sugar
140g self-raising flour
50g ground almonds
1/2 tsp baking powder
3 eggs
1/2 tsp vanilla extract
1/4 tsp almond extract
For the pink sponge
Same quantity of ingredients as above
1/2 tsp pink food colouring
For assembly:
2 x 500g marzipan blocks
200g apricot jam
Method
Heat your oven to 180°C / 160°C Fan / Gas Mark 4 and line a square baking tin (20cm) with baking parchment.
Make the almond sponge by combining the butter, sugar, flour, ground almonds, baking powder, eggs and vanilla & almond extracts in a mixer and beat until everything comes together smoothly. Pour into the prepared cake tin and bake for 25-30 minutes, then allow to cool in the tin for 10 minutes before transferring to a wire rack.
Clean the tin and line with baking parchment as before. Make the pink sponge by combining all the ingredients again and, once everything has come together, fold in some pink food colouring. Pour into the cake tin and bake and cool as before.
Heat the jam in a small saucepan until it comes to a runny consistency, then strain into a bowl through a sieve. Trim two opposite edges from the almond sponge, then trim a third edge. Measure the height of the sponge then, using a ruler, cut 4 slices each the same width and height. Repeat with the pink sponge, and discard and cut-offs.
You should now have long slices of sponge (4 yellow, 4 pink) that measure the same. Roll out one of the marzipan blocks, on a surface lightly dusted with icing sugar, until you have a sheet of marzipan about 20cm wide and 0.5cm thick.
Brush the marzipan with the apricot jam, then lay a pink and an almond slice side by side at one end of the marzipan. Brush jam in between the slices to stick them together, then brush more on top before laying another pink and another almond slice on top in a checkerboard pattern. Trim the marzipan to the length of the cakes.
Lift the marzipan up and smooth over the cake with your hands, leaving a small fold along the bottom edge, then seal and crimp together using your fingers.
Repeat the process as above to make the second cake.
The lovechild of croissants and muffins. These buttery, flaky pastries are unlike anything you’ve had before and are perfect for brunch or for an indulgent afternoon treat.
Ingredients
230g ready to roll puff pastry
4 tbsp butter
130g granulated sugar
1 tbsp cinnamon
1 egg, beaten
1 tsp milk
Method
Preheat your oven to 190°C / 170°C Fan / Gas Mark 5 and lightly grease 8 holes of a muffin tin.
Roll out one sheet of the puff pastry into a rectangle measuring 11×15 inches. The dough should be quite thin, but not so thin that you can see through it.
Spread 2 tbsp of the butter onto the sheet of pastry thinly, then mix the cinnamon and the sugar together and sprinkle some over the top of the butter in an even coating. You will want some cinnamon sugar reserved for later, so be careful not to use it all.
Working from the long edge, roll the pastry up as tight as you can. Slice the roll in half length ways, and then cut each strip in half again. This will leave you will 4 equal strips of layered dough. Roll each piece into a swirl and place in the muffin tin. Repeat the whole process again with the remaining sheet of pastry.
Brush the tops of the cruffins with egg wash, and bake for 40-50 minutes until golden brown. Allow to cool for 10 minutes, then remove from the pan and roll each cruffin in the remaining cinnamon sugar to coat.
Another great one to get the kids involved with this summer! These little cake bites are great for picnics, bake sales or even just for having a snack-stash in the house!
Ingredients
For the cakes
225g unsalted butter, softened
225g golden caster sugar
4 eggs, beaten
2 tsp vanilla extract
2 tbsp apricot jam
200g marzipan
Icing sugar, for dusting
For the buttercream
250g unsalted butter, softened
300g icing sugar
1 tsp vanilla extract
To decorate
500g ready-to-roll fondant
Red food colouring
Yellow food colouring
Green food colouring
50g dark chocolate, melted
Method
Preheat your oven to 180°C / 160°C Fan / Gas Mark 4. Grease a 20cm square cake tin with baking parchment, leaving a slight overhang to help you remove the cake once it’s cooked.
Beat together the butter and sugar until pale and fluffy, then gradually add in the eggs, continuously beating. Pour in the vanilla extract and allow to mix in, then tip the cake mixture into the tin and smooth the surface down. Pop in the oven and bake for 40-45 minutes until a skewer inserted into the centre of the cake comes out clean.
Cool the cake in the tin for a few minutes, then transfer to a wire rack and leave to cool completely. Heat the apricot jam in a saucepan to remove any lumps, and then brush over the top of the cake.
Sprinkle some icing sugar on a clean surface, then roll out the marzipan thinly. Cut out a 20cm square to match the cake’s shape, then place on top of the cake and chill in the fridge for 10 minutes.
While your cake is chilling, make the buttercream by beating together the butter and icing sugar until smooth, and then mixing in the vanilla extract.
Remove your cake from the fridge, and cut into 25 equal squares (each around 3.5cm square). Spread the exposed sides of the cake with a thin layer of buttercream and then, using a piping bag, place a blob of buttercream on top of each marzipan topped square. Return to the fridge and chill for at least one hour until the buttercream has set.
Place your fondant in your mixer and beat until the icing starts to break apart. Slowly pour in around 80ml of water until the icing reaches a pouring consistency, then divide between three bowls. Add a drop of each food colouring into each bowl and stir to combine, gradually adding tiny amounts of food colouring at a time until you reach your desired shade.
Stick a fork in the base of each cake and spoon over the fondant, turning the fork as you go so that you achieve an even coating. Place on a wire rack and leave to set (usually around 10 minutes).
Spoon the melted chocolate into a piping bag fitted with a small nozzle, and quickly pipe over the top of the cakes in a zig-zag motion. Leave to set in a cool place, but don’t place in the fridge as this will cause the icing to lose its shine.
Made with your choice of cherries, redcurrants or blueberries, this rich and creamy summer berry brulée is the perfect decadent treat for any alfresco dining party.
Ingredients
50g pudding rice
140g cherries, redcurrants or blueberries
4 tbsp cassis liquer
1 vanilla pod, split
568ml double cream
6 eggs, yolks only
2 tbsp golden caster sugar
An extra 85g golden caster sugar for the topping
Method
Cook the rice according to pack instructions, then drain and leave to cool. Divide your chosen fruit between 6 ramekin dishes, drizzle with the cassis and then st to one side.
Remove the seeds from the vanilla pod, then throw into a pan with the empty pod and the cream. Bring to the boil, remove from the heat and leave for 5 minutes. Remove the vanilla pod.
Mix together the egg yolks and sugar in a large bowl, then stir the vanilla cream. Return to the pan and cook over a low heat, stirring constantly, until it thickens.
Stir the cooked rice into the custard mixture, then ladle into the ramekins and refrigerate for six hours.
When the time comes to serve, sprinkle the sugar over the top and caramelise using a blow torch, or by sliding under a very hot grill. Let it cool and harden, then serve.
Another year has passed, and it’s once again time for us to visit ‘The Great British Bake Off’ tent. The baking programme has become essential British viewing over the years, and it’s so easy to get inspired to make your own kitchen creations! If you want to know how to get Bake Off ready so you can cook alongside the baking stars, we’ve got you covered.
Baking essentials
A Cooks Professional stand mixer will be essential. Source: Cooks Professional.
You won’t be making much progress without getting the bare baking essentials ready! The equipment you need will be specific to the recipe you choose; if you’re making gooey chocolate brownies, you’re not going to need a rolling pin. Take a look at what kitchen concoctions you want to try and stock up on what you need.
A good place to start is a stand mixer – this will be a welcome addition to your kitchen if you regularly make cakes, as well as a variety of other treats. Cake tins, mixing bowls, and a set of measuring scales are a worthwhile investment too. Those will suit a variety of sweet and savoury creations, no matter what you choose to make.
These are just the basics, of course – if you want to do more intricate stuff like piping, you’ll need to stock up on piping bags and an assortment of piping nozzles to make your buttercream stand out from the crowd. For things like game pies that we often see in Bake Off challenges, you’ll likely need a special tin so as to keep your pie in check in the oven.
Foodie inspiration
Looking at recipes will be a good place to get started. Source: Motortion via Getty images.
The best way to get inspired is to take a look at recipes to tempt your tastebuds. If you want a good place to start we have a variety of tasty recipes right here on our blog. Recipe books from your favourite chefs is another great place to start, or even food bloggers can give you an idea of where to get started.
Remember that baking is supposed to be fun, so pick something that gets you excited to start cooking! Things like croissants are more complicated, so certainly aren’t for the less confident – it can take days to prepare the pastry for that particular delicacy. If you consider yourself more of a novice, choose something fun and simple to get you started. Why not give our Eton mess a try? Or for the more adventurous, this gin and tonic cake is the perfect recipe to start with.
If you’re up for more of a challenge, why not try creating your own recipes? Have a think about what flavours will combine well, and get experimenting. Be wary of more potent ingredients like lavender or liquorice – the strong flavour can often make them difficult to use. Start with a basic Victoria sponge or crumble recipe, and then add your own twist.
Practice, practice, practice
Practising your piping is essential for perfection. Source: Unsplash.
The best way to make sure your baking excels it to keep practising. If you get the hang of the basics, you’ll be well on your way to Bake Off ready. Don’t be put off by burning your caramel, or your souffle sinking – it’s better to try, try, and try again until you whip those baking skills into shape.
We’re sure your family and friends will be all too willing to taste your bakes, so you can get the feedback you need to improve. That pavlova didn’t turn out as you expected? Bake another one! The flavours are spot on, but that piping needs extra work? Keep practising with those piping bags until everyone marvels at your buttercream prowess. You can practice by using a glass or a mirror to pipe onto. Not only will these let you view your beautiful designs, but they’re easy to wipe clean afterwards.
Don’t be too hard on yourself if you can’t get it right the first time around. Paul Hollywood wouldn’t be a bread extraordinaire if there weren’t a few duff loaves along the way! You can learn from your mistakes, and find yourself a better baker at the end of them.
Now that you’ve got all the knowledge you need to get started, it’s time to go and get baking! The best way to get Bake Off ready is to keep practising and going over those essential skills. If you keep up the hard work, you’ll be a star baker in no time at all.
To get you in the habit of baking regularly, why not enter our Bake of the Month competition over on Facebook? We encourage everyone to share their kitchen creations with us at the end of each month, and you could even win yourself a lovely baking prize too!
Lime, cream and a buttery biscuit base combine to make this an indulgent, zesty, summertime treat. Perfect for your next alfresco dining experience, and guaranteed to impress your friends and family.
Ingredients
300g rolled oat biscuits (we recommend Hob Nobs)
150g butter, melted
1 x 397g can of condensed milk
3 eggs, yolks only
4 limes, zest and juice
300ml double cream
1 tbsp icing sugar
1 extra lime, zested and sliced, for decoration
Method
Heat your oven to 160°C / 140°C Fan / Gas Mark 3. Grab a food processor and add in the biscuits, then pulse until you have fine, sand-like crumbs.
Pour in the melted butter, and give everything another quick blitz, then empty out into a 22cm loose-bottomed tart tin, pressing down and into the sides with your fingers until you have a firm surface. Place in the oven and bake for 10 minutes.
Meanwhile, pop the egg yolks into a bowl and whisk for one minute with an electric beater.
Add in the condensed milk and whisk for a further 3 minutes, then tip in the finely grated zest and the juice from the limes. Whisk again for another 3 minutes.
Remove your pastry case from the oven, and allow to cool completely inside its tin. Once totally cool, pour in the filling and then place back in the oven for 15 minutes. Remove from the oven, allow to cool completely, and then cover and refrigerate for at least three hours.
When you are ready to serve, release the pie from its tin. Softly whip together the double cream and icing sugar, then spread (or pipe) over the top. Finish by decorating with the zest and slices from the extra lime.
Bring some sunshine into your kitchen with this vegetable tart. Made with aubergine, sweet potatoes and courgette, it’s not only beautiful to look at, but is an easy way to get in some of those 5-a-day!
Begin by making the pastry. Pop the flour in a bowl along with 1/2 tsp of salt, then add the butter and rub together using your fingertips until you have a mixture that resembles fine breadcrumbs.
Add in the cheese and stir through using a butter knife, then add the egg yolk. Drizzle in 1 tbsp of cold water, then stir everything together (still using the knife) until clumps of dough begin to form. Alternatively, you can whizz everything together in a food processor to make the pastry.
Tip out onto a work surface and bring the dough together with your hands into a smooth ball. Wrap in cling film, and chill in the fridge for at least 20 minutes.
Slice the sweet potatoes, courgettes and aubergine length ways as thinly as possible, brushing the aubergine with lemon juice as you go to prevent it from turning brown. Put the sweet potato in a bowl with 2 tsp of water and microwave on high for 2 minutes, then remove and leave to cool. Do the same with the aubergine and courgettes, but adjust the microwaving time to 30 seconds.
Remove the pastry from the fridge and and roll out to a thickness of 0.5cm. Lin a 23cm fluted tart tin with the pastry and trim the sides, leaving on overhang of about 1cm. Pop back in the fridge and chill for a further 10 minutes. Heat your oven to 200°C / 180°C Fan / Gas Mark 6.
When the pastry is cold and firm, line it with scrunched up baking paper and fill with baking beans. Bake for 15 minutes, then remove the beans and parchments and bake for a further 5 minutes.
In the meantime, make the filling by combing the mascarpone, eggs, pesto, breadcrumbs and gruyere in a bowl. Season well and mix.
Remove the pastry from the oven and trim the sides with a sharp knife so that they are flush with the top of the tin. Pour in the filling and spread out evenly.
Reduce the oven heat to 180°C / 160°C Fan / Gas Mark 4. Drain any liquid from the vegetables and pat dry with kitchen paper. Place a slice of sweet potato, courgette and aubergine on top of each other in a stack, then roll into a spiral. Place in the middle of the tart, then build another stack and, instead of creating a spiral, wrap these around the central spiral in the tart. Continue doing this until you have created a rose effect. Sprinkle the thyme leaves between the layers of vegetables, and drizzle the oil over the top.
Bake for 40-45 minutes until the vegetables are tender and the filling has set. Leave to cool in the tin for 15 minutes. Serve hot or cold.
Cherries are fully in season now, and what better way to celebrate these little ruby beauties than to turn them into some delicious jam. Perfect to give away as gifts, or simply to store and enjoy yourself!
This jam will store for up to six months unopened, or up to three months opened and kept refrigerated. To sterilise your jars, simply run them through the dishwasher and allow them to dry in there.
Ingredients
2kg cherries, pitted
1.2kg jam sugar (with added pectin)
2 lemons, juiced
Method
Place two saucers in the freezer – these will be used for testing if the jam is ready later on.
Begin by roughly chopping half of the cherries, and slicing the other half vertically.
Simmer, uncovered, over a medium heat for 35 minutes, stirring frequently until glossy and thick.
Remove from the heat and test if it’s ready by spooning a little of the jam onto one of the chilled saucers. Leave it for one minute, then lightly press your fingertip into the jam – if it starts to wrinkle, it’s ready. If it slides away, boil for another 10 minutes and then test again on the second saucer.
The perfect snack for Wimbledon! These little cupcakes are ‘ace’ and you really ought to take full ‘advantage’ of making them. Perfect with a glass of champagne mixed with orange ‘deuce’. Ok…we’ll stop now.
Ingredients
For the cupcakes
150g self raising flour
1/2 tsp baking powder
15g cornflour
1 small orange, zest only
175g soft unsalted butter, cut into small cubes
175g caster sugar
3 eggs
50g raspberries
50g strawberrie, roughly chopped
For the Pimm’s syrup
150ml Pimm’s
50g caster sugar
For the Pimm’s buttercream
275g unsalted butter
50ml milk
2 tbsp Pimm’s
350g icing sugar
To decorate
6 strawberries, sliced
A few mint leaves
Method
Preheat your oven to 180°C / 160°C Fan / Gas Mark 4, and line a 12-hole muffin tin with cupcake cases.
Sieve the flour, baking powder and cornflour into a large bowl and stir in the orange zest.
In a separate bowl, whisk together the butter and caster sugar until light and fluffy. Then alternately whisk in the eggs and flour mixture until everything is combined. Lightly crush the raspberries and strawberries, then fold these into the batter.
Divide the mixture between the cupcake cases and bake in the oven for 25 minutes.
While your cakes are baking, make the syrup by gently heating the Pimm’s with the sugar in a medium saucepan, stirring until the sugar has dissolved. Increase the heat and bring to a gentle bubble for around 6 minutes until you have a thick syrup. Pour into a jug and leave to one side.
As soon as your cupcakes come out of the oven, prick the tops all over with a toothpick and brush them with the Pimm’s syrup. Leave them to cool in their tray for 10 minutes before transferring to a wire rack to cool completely.
While the cakes are cooling, make the buttercream. Mix together the butter, milk and Pimm’s on a low speed until smooth. Keeping the speed low, gradually add in the icing sugar and mix until smooth and thick. Transfer your icing to a piping bag with a 1cm star nozzle.
Once the cupcakes are completely cool, pipe each one with a swirl of icing and decorate with the sliced strawberries and mint leaves.
Perfect for a picnic on a sunny day, or simply as an ‘anytime’ treat. We’ll let you decide which way round the jam and cream go though!
Ingredients
225g self-raising flour
1/4 tsp salt
50g salted butter, chilled, cut into cubes
25g golden caster sugar
125ml buttermilk
4 tbsp whole milk
Strawberry jam and clotted cream to serve
Method
Preheat your oven to 220°C / Fan 200°C / Gas Mark 7. Add the flour to a mixing bowl with the salt, then tip in the butter. Rub the flour and butter between your fingers until you have a fine crumbed mixture, lifting to aerate as you go. Stir in the sugar.
Combine the milk and the buttermilk, and make a well in the centre of the flour mixture. Pour in the buttermilk & milk and, using a butter knife, gently work everything together until you have a soft, fairly sticky dough.
Lightly flour a surface and turn the ball of dough out. Knead the mixture a few times, just to get rid of any cracks.
Pat down the dough gently to a thickness of around 2.5cm. Grab a fluted cutter and begin to cut out the scones by pushing down firmly. Gather up any trimmings, reform the dough ball, and cut out more scones.
Place the scones on a lightly greased baking sheet and bake for 10-12 minutes until risen and golden. Transfer to a wire rack to cool.
Serve with strawberry jam and clotted cream – we’ll let you decide which way round they shoud go!
This delicious summer dessert laden with tropical fruits is a guaranteed crowd-pleaser for any dinner party or barbecue.
The meringue base can be made up to two days in advance, just store it in an airtight container.
Ingredients
For the meringue
5 eggs, whites only
300g caster sugar
1 tsp vanilla extract
1 tsp white wine vinegar
1 tsp cornflour
25g desiccated coconut
To serve
300ml double cream
100ml creme fraiche
100g caster sugar
1 tsp vanilla extract
Selection of your favourite tropical fruits
Method
Begin by heating your oven to 140°C / 120°C Fan / Gas Mark 1.
Separate the egg whites into a bowl and add the sugar. Whisk them together for about 10 minutes until you have stiffy, glossy peaks.
Combine the vanilla, vinegar and cornflour together in a separate bowl until smooth, and then fold this into the eggs along with the coconut.
Place a piece of baking parchment on a baking sheet, and spoon the meringue mix over it, smoothing out to form a circle about 20-25cm wide, swirling with a knife to make peaks around the edges.
Cook for 1 hour until the meringue is crisp and ever so slightly browned. Turn off the oven, leaving the meringue inside to cool. Once fully cool, remove from the oven and peel off the paper.
To serve, whip up the cream, creme fraiche, sugar and vanilla extract together until soft peaks form. Spread this over the centre of the meringue, top with your chosen fruits and serve.
This classic patisserie favourite does require a little more effort than your average bake, but we promise it will pay off in both taste and the looks in your friends and families eyes as they marvel at your baking skills!
To get achieve equal sizes when forming the three rectangles, lay the first one you cut on top of the other to use as a guide, then repeat.
Ingredients
3 tbsp caster sugar
350g puff pastry
300ml double cream
1 vanilla pod
600g strawberries
1/2 lemon, zest only
Small bunch of basil, leaves only
50g good-quality white chocolate
Method
Heat your oven to 200°C/180°C Fan/Gas Mark 6. Lightly flour a surface using some plain flour, then scatter a little sugar over the top. Roll the pastry out to a rectangle, around 28x30cm, then line a large baking sheet with parchment and scatter with a little more sugar. Carefully, using a rolling pin, lift the pastry onto the baking parchment.
Scatter a little more sugar over the pastry and cover with another sheet of parchment. Lay another baking sheet on top, and weigh it down with an empty ceramic dish. Bake for 25-30 minutes until the pastry is golden and crisp, then set aside to cool.
Make the filling by pouring the cream into a bowl along with 3 tbsp of sugar and the vanilla seeds. Whisk until the cream just about holds it shape, then set to one side. Hull the strawberries, then chop into 3 or 4 chunks. Finely chop the basil, and fold through the cream along with the strawberries and lemon zest. Cover and chill until needed.
When the pastry has cooled completely, trim the edges to form a neat rectangle and then cut into three equal rectangles.
Assemble the mille-feulle by laying down one rectangle of pastry, add half the cream and strawberry mix and flatten down with the back of a spoon. Place the second pastry layer on top and press down gently. Finely grate over half of the white chocolate, and top with the remaining cream mix, then place the final layer of pastry on top and press down gently.
Smooth the edges of the mille-feuille using a pallete knife so that the filling is level with the edges of the pastry, then finely grate the remaining white chocolate on top.
To serve, carefully slice the mille-feuille into 6 equal pieces.
A zingy, summer time dessert. This lemon posset is also a low-effort way to impress your dinner guests!
Ingredients
For the lemon posset
600ml double cream
200g golden caster sugar
3 lemons, zest only
75ml lemon juice
For the shortbread
140g cold butter, diced
140g plain flour
85g golden caster sugar
50g ground rice (or plain flour if you’re unable to source ground rice)
85g flaked almonds
Method
Make the posset first. Pour the cream into a large saucepan along with the sugar and heat gently, stirring until the sugar has melted. Bring to a simmer and allow to bubble for 1 minute. Turn the heat off, then stir in the lemon zest and juice. Divide the mixture between pots, glasses or bowls and allow to come to room temperature before carefully covering and chilling in the fridge for at least 3 hours.
To make the shortbread, heat your oven to 160°C / 140°C Fan / Gas Mark 3. Whizz the butter and flour together in a food processor until no lumps of butter remain. Tip into a bowl, then stir in the sugar, ground rice and almonds.
Line the base of a square tin (roughly 22cm) with baking parchment, and tip the mixture in, pressing it down firmly. Try and get it as flat as you can. Dredge with sugar, and bake for 25-30 minutes until pale golden. Allow to cool in the tin.
Cut the shortbread into shards, and serve alongside the lemon possets.
Tasting just as good as they look, these are perfect for afternoon tea, or make a real showstopper at a bake sale!
Don’t add too much food colouring at once – remember that you can always add in more until you reach your desired colour, but it’s much harder to fix the other way around!
Ingredients
4 large eggs, whites only
300g icing sugar
Pink food colouring
140g ground almonds
125g mascarpone
4-5 tbsp raspberry jam
Method
Begin by whisking the egg whites in a large, clean bowl until they begin to form soft peaks. Whisk in the icing sugar in 3 or 4 batches, whisking well between each addition. With the final addition of sugar, add in a few drops of food colouring, and keep whisking until the mixture is light pink, thick and glossy.
Grab a large metal spoon, and gently fold through the almonds. Cover 4 baking sheets with baking parchment and dab a little of the mixture into the corners, then fold over to secure the paper to the trays.
Using a piping bag fitted with a wide nozzle (or 2 small spoons) make about 40 circles, each about 5cm wide. Leave to sit out for around 10 minutes, until a skin begins to form.
Heat your oven to 180°C / 160°C Fan / Gas Mark 4. Place the baking sheets in the oven, leaving the oven door slightly ajar to allow steam to escape, and bake for 20-25 minutes until just crisp, but not browned. Remove from the oven and leave to cool on their trays.
When ready to serve, gently ease from the paper using a palette knife. Carefully spread 1 tsp of the raspberry jam per biscuit over half the biscuits, and 1 tsp mascarpone per biscuit over the other half of the biscuits, and then gently sandwich together.
The perfect partners, this chocolate and cherry fudge is unbelievably easy to make, and also makes a perfect homemade gift.
Ingredients
250g dark chocolate
25g butter
30g dried sour cherries
150g caramel or dulce de leche
Method
Line a 18cm brownie tin (or similar) with cling film.
Pour some freshly boiled water into a saucepan and bring to a gentle simmer. Place a heatproof bowl on top of the saucepan, and add the chocolate and butter to the bowl. Stir gently until everything has melted.
Add in the sour cherries along with the caramel, and mix everything together. Pour your chocolately mixture into your prepared tin.
Chill in the fridge for around 1 hour until it has set, then turn it out onto a board and remove the cling film. Chop into squares and serve.
These colourful little cakes are perfect for afternoon tea, a bake sale or simply for just having a stash in the cupboard! Made with cream cheese frosting, they are the decadent treat that you need to try!
Ingredients
For the cupcakes
250g plain flour
2 tbsp baking powder
2 tbsp cocoa powder, sifted
1/2 tsp bicarbonate of soda
100g soft unsalted butter
200g caster sugar
1 tbsp red food colouring
2 tsp vanilla extract
2 eggs
175ml buttermilk
1 tsp cider vinegar
For the frosting
500g icing sugar
125g cream cheese
125g soft unsalted butter
Method
Preheat your oven to 170°C / 150°C Fan / Gas Mark 3, and line 2 x 12 hold muffin tins with paper cases.
Combine the flour, cocoa powder, baking powder and bicarbonate of soda in a bowl and set to one side.
Cream together the butter and sugar in a stand mixer and when you have a soft, pale mixture add in the vanilla and the food colouring.
With the mixer still gently beating, add in 1 spoonful of your dry ingredients, followed by one egg, followed by half of the remaining dry ingredients, then the other egg. Then add in the rest of the dry ingredients.
Finally, add in the buttermilk and the vinegar, then divide the mixture between the 24 cases. Bake in the oven for about 20 minutes, inserting a clean skewer into one of the cupcakes to check if it’s cooked. Leave to cool on a wire rack.
Whilst the cakes are cooling, start making the icing by putting the icing sugar in a food processor and pulsing to remove any lumps.
Add the cream cheese and butter and process to mix. Pour in the cider vinegar and process again until you have a smooth icing.
A sumptuous, summery treat. The combination of figs and blue cheese delivers a real flavour punch, and the crumbly walnut pastry melts in the mouth.
Ingredients
200g plain flour
100g wholemeal flour
175g cold butter (150g diced into chunks)
100g walnuts, roughly chopped
3 eggs, whole
2 eggs, yolks only
400g shallots, sliced
1 tbsp fresh thyme, leave only
200ml creme fraiche
200ml double cream
140g blue cheese
4 figs, halved
Method
Begin by making the pastry. Tip both flours into a food processor along with the diced butter and a pinch of salt. Pulse until lump-free, then add in the chopped walnuts. Mix the egg yolks with 3 tbsp of water, then pour into the machine and pulse again until the pastry comes together.
Tip the pastry out onto a floured board, lightly bring into a ball shape, then roll out flat. Lay this over a 20-23cm tart tin, allowing some overhang at the sides. Cover and chill for 1 hour.
Meanwhile, make the filling by melting the remaining butter in a large pan and add in the shallots. Soften for 10-15 minutes until soft and golden, then stir in the time and cook for a further minute. Remove from the heat.
Beat the eggs in a jug with the creme fraiche and cream, then crumble in the blue cheese and season well.
Heat your oven to 200°C / 180°C Fan / Gas Mark 6. Blind bake the pastry for 20 minutes, remove the baking beans and paper, then bake for a further 15-20 minutes until golden and sandy. Reduce the oven to 180°C / 160°C Fan / Gas Mark 4.
Add the cooled onions to the cream mixture and pour into the cooked pastry case. Sit the fig halves on top, cut side up, and sprinkle with some more thyme. Bake for 1 hour until the tart has started to brown and has a slight wobble to it.
Allow to cool for 15-20 minutes, remove from the tin and serve with a green salad.
Super easy to make. Gooey, chocolately and simply irresistible. Perfect for afternoon teas and bake sales, and one that the kids will love helping out with!
If you’re unable to find mini marshmallows for this, then chopped up full sized ones are just as good.
Ingredients
200g digestive biscuits
135g butter
200g good quality dark chocolate
2-3 tbsp golden syrup
100g mini marshmallows
Icing sugar, to dust
Method
Grease and line an 18cm square brownie tin with baking paper.
Place the digestive biscuits in a freezer bag and bash with a rolling pin until they’re broken up. You’re looking for a mixture of biscuit dust and larger broken biscuit pieces.
In a large saucepan melt the butter along with the dark chocolate and golden syrup over a gentle heat, stirring constantly until there are no lumps of chocolate visible. Remove from the heat, and leave to cool.
Take the biscuit crumbs and marshmallows, and stir into the chocolate mixture until everything is completely covered.
Tip the mixture into the lined baking tin, and spread it out to the corners. Chill for at least 2 hours, then dust with the icing sugar and cut into 12 equal pieces.
A cake fit for the Queen! This gorgeous cake is a great dessert for any summer dinner party, or for really impressing at a bake sale!
Ingredients
For the cake
250g salted butter
350g golden caster sugar
4 eggs
250g self-raising flour
75g natural yoghurt
2 limes, juice only
75ml gin
150ml tonic water
For the icing
200g softened butter
400g icing sugar
2 tbsp milk
3 limes, zest only
To decorate
2 limes, zested and cut into thin wedges
1 tbsp granulated sugar
Lemon sherberts
1/4 cucumber, peeled into ribbons
Method
Heat the oven to 180°C / 160°C Fan / Gas Mark 4, then grease and line 2 x 20cm cake tins.
Beat together the butter and 200g of sugar in a stand mixer until pale and fluffy, for around 5 minutes. Add the eggs, one by one, making sure each one is fully incorporated into the mixture before adding the next. Add in the flour, and mix into the egg and sugar.
Mix the natural yoghurt with the juice of one of the limes, and 50ml of the gin. Add this to the cake mixture and slowly mix until you have a silky, thick mixture. Split the mixture between the two cake tins and bake for 35 minutes, until a skewer comes out clean.
Whilst the cakes are cooking, make the syrup by putting the remaining sugar, tonic water and juice of one lime into a saucepan over a medium heat. Once the sugar has dissolved, bring to a boil and cook for 5-7 minutes until you have a thick syrup. Allow to cool for five minutes, strain, and then add in the remaining gin. Set to one side.
Once the cakes are out of the oven, allow them to cool for five minutes. Prick all over with a skewer, then spoon the syrup mix over both of the cakes. Now allow them to cool completely in their tins.
Make the buttercream by beating the butter until soft, then add the icing sugar a little at a time. Once fully incorporated, add the milk and the zest of the limes.
Assemble by placing one of the cake layers on a board and cover with 1/3 of the buttercream. Sit the second layer on top, and cover this with a thin layer of buttercream. Place the cake in your fridge for 30 minutes to firm up, then use the remaining buttercream to cover the top and sides of the cake.
Mix the lime zest and sugar together, and sprinkle over the top to decorate. Finish with the lemon sherbets, lime slices and cucumber ribbons.
With strawberry season in full swing, why not try turning them into something even more decadent with our strawberry cheesecake recipe.
Ingredients
For the cheesecake:
250g digestive biscuits
100g butter, melted
1 vanilla pod
600g full fat soft cheese
100g icing sugar
284ml pot of double cream
For the topping:
400g fresh strawberries
25g icing sugar
Method
Begin by making the base. Butter and line a 23cm loose-bottomed tin with baking parchment, and set to one side. Place the digestive biscuits in a plastic food bag and, using a rolling pin, bash them until you have fine crumbs. Transfer to a bowl and mix in the melted butter until all the crumbs are thoroughly coated.
Tip the mixture into the lined tin, creating an even layer, and chill in the fridge for 1 hour to set firmly.
Slice the vanilla pod length ways, and scrape out the seeds.
Put the cream cheese, icing sugar and vanilla seeds in a bowl and beat everything together using an electric whisk until smooth. Add in the double cream and continue whisking until everything is combined.
Spoon the mixture onto the biscuit base, starting from the edges and working inwards, making sure that there are no air bubbles. Smooth down the surface of the cheesecake, cover with cling film and allow to set in the fridge overnight.
Remove the cheesecake from the tin and allow to come to room temperature about 30 minutes before you’re ready to serve.
Meanwhile, puree half of the strawberries in a blender or food processor with the icing sugar and 1 tsp of water, then strain through a sieve.
Decorate the top of your cheesecake with the remaining strawberries, and drizzle the puree over the top.
Marshmallows and chocolate sandwich between biscuits. What’s not to love? Kids will not only enjoy devouring these, but will also love helping you make them.
For an extra special treat, dunk them in your hot chocolate. A real winter warmer!
Ingredients
16 biscuits of your choice (we recommend malted biscuits)
8 squares of milk chocolate
8 marshmallows
Method
Preheat your grill to high and line a baking sheet with parchment. Put all 16 biscuits onto the tray, and add a square of milk chocolate on 8 of them and 1 marshmallow on the other 8.
Place the tray under the grill until both the chocolate and marshmallows are melting.
Sandwich the two different types on top of each other until oozing at the edges and eat while hot.


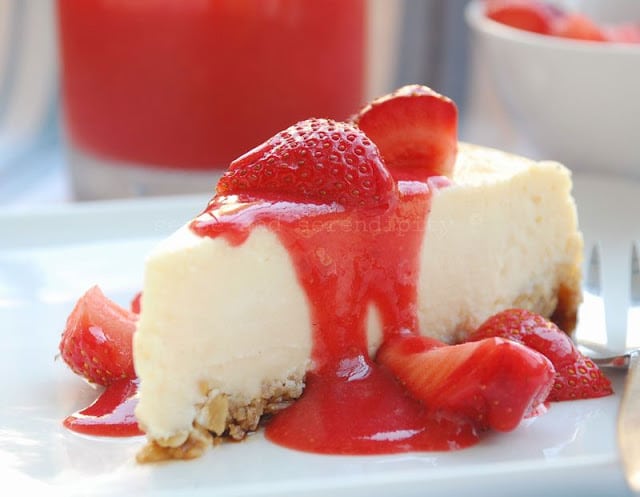
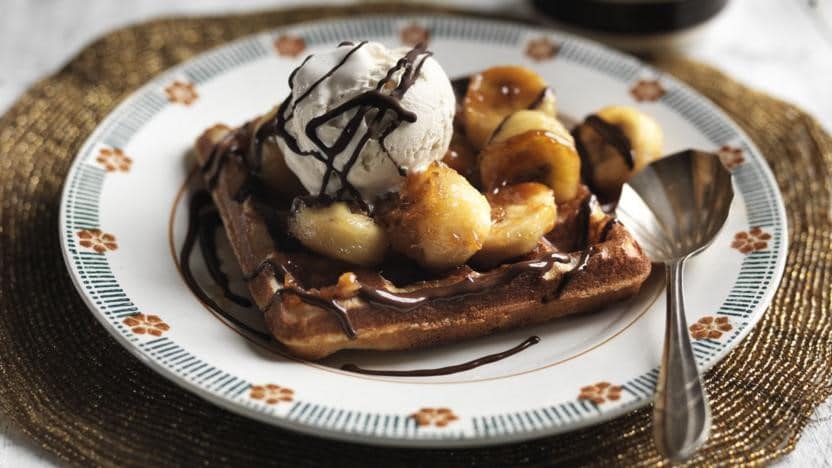

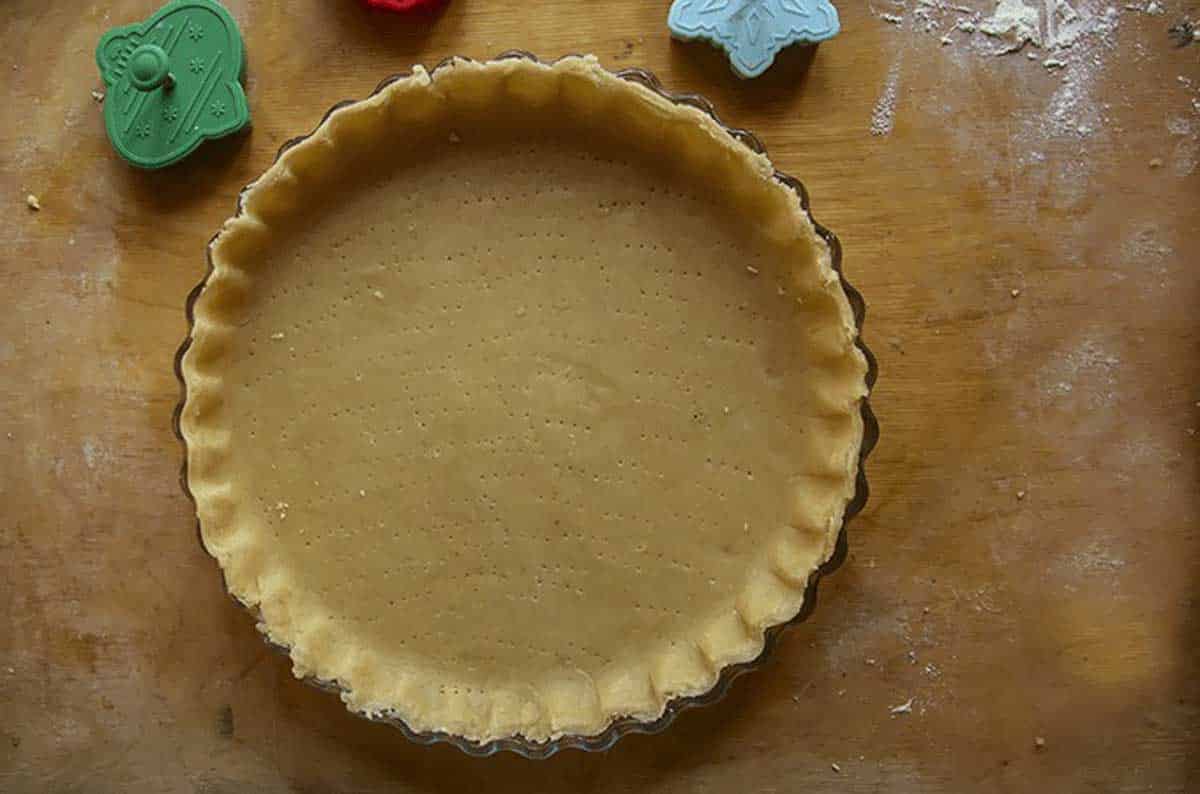


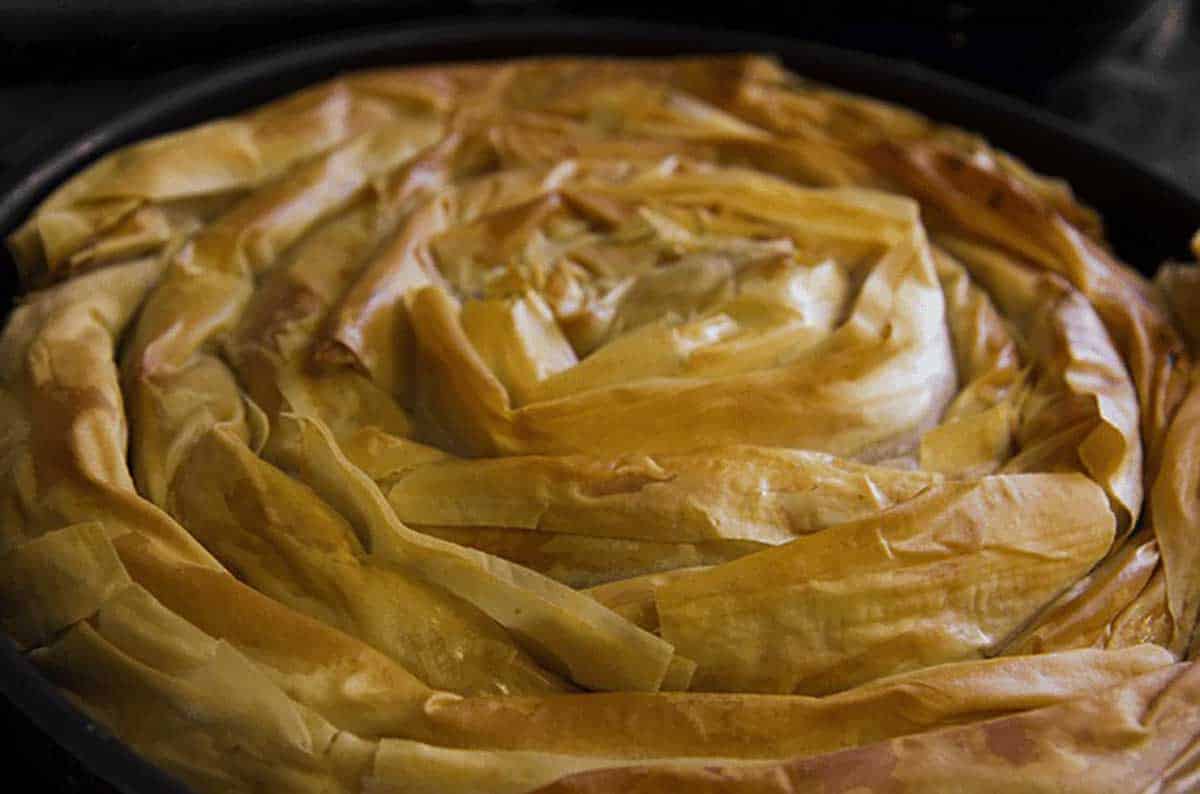


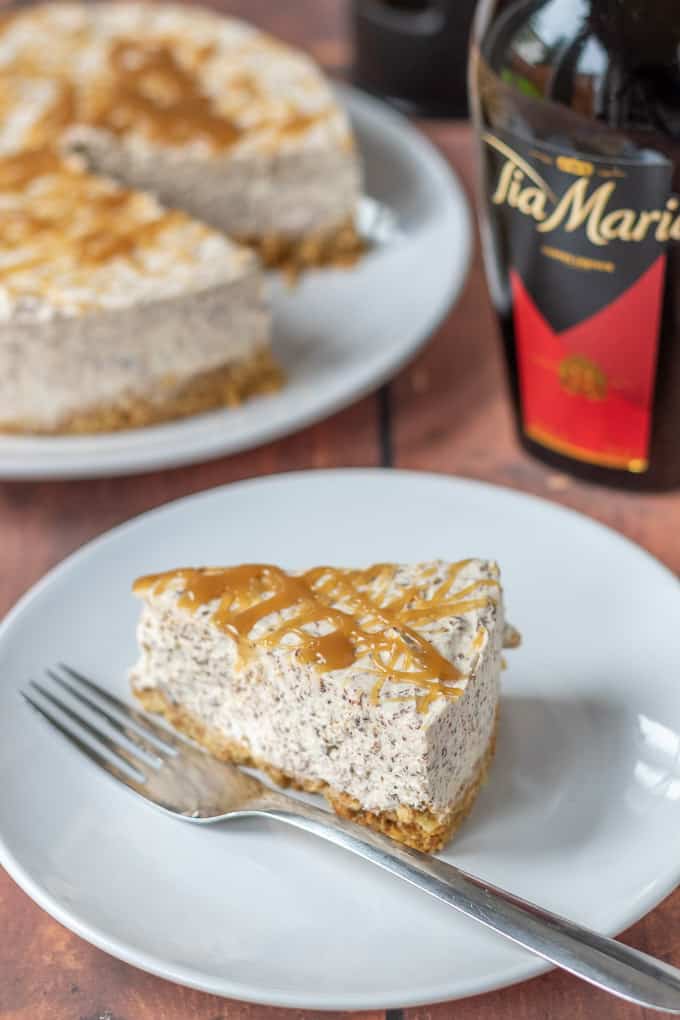

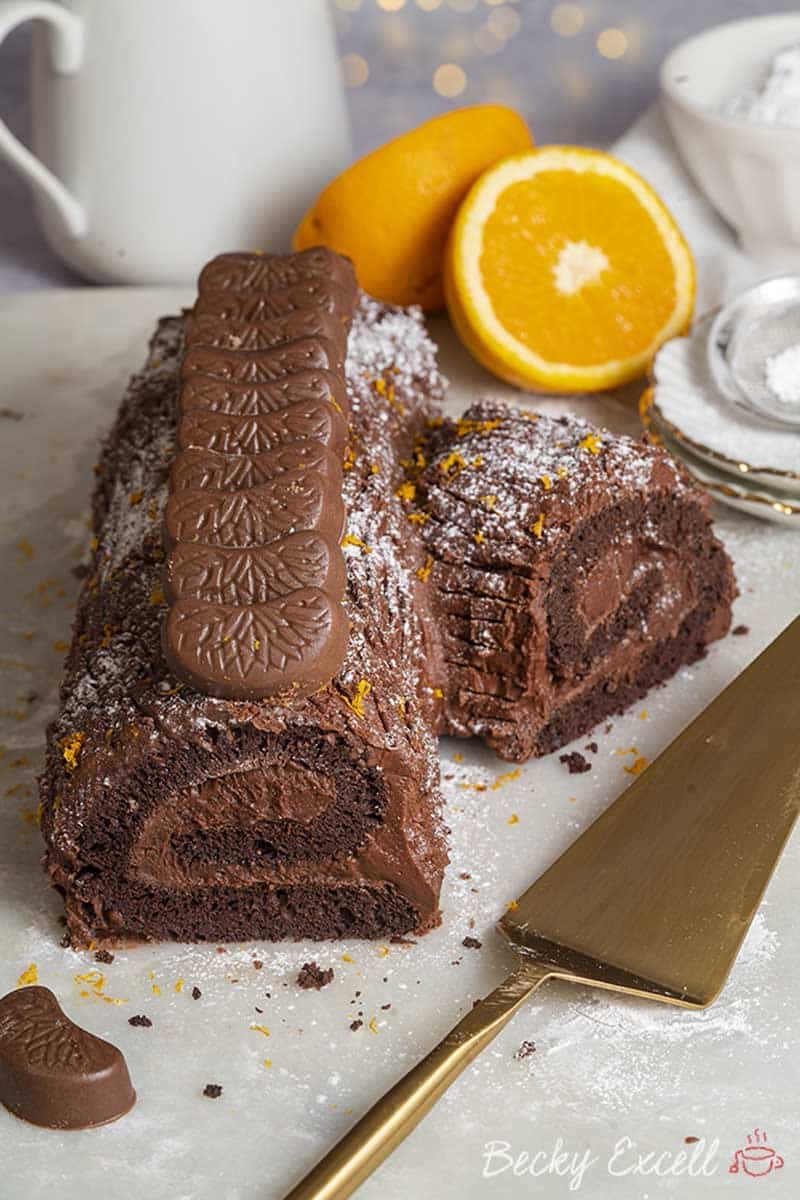


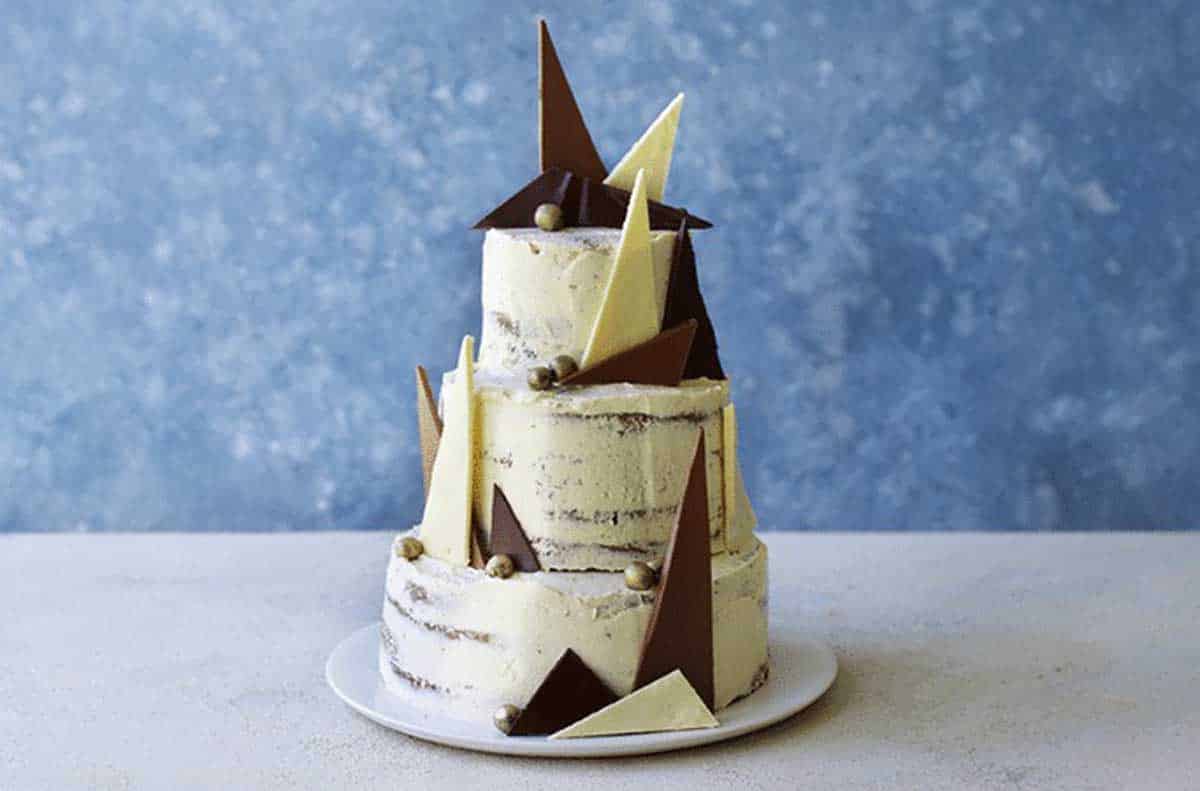


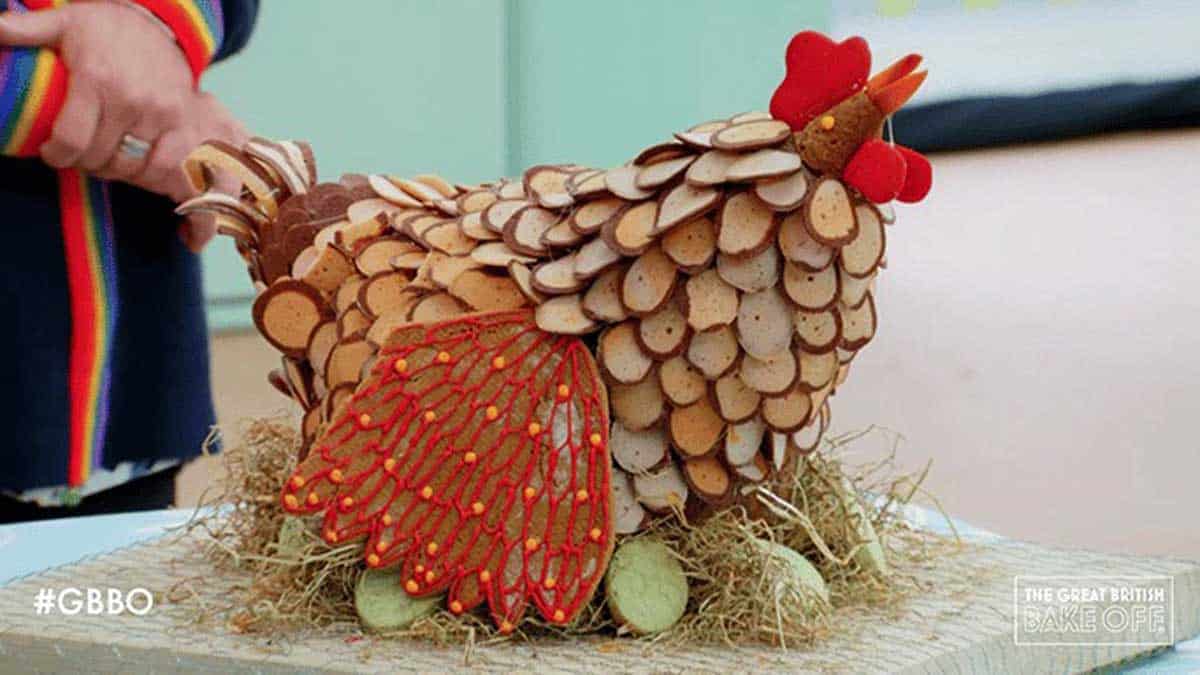

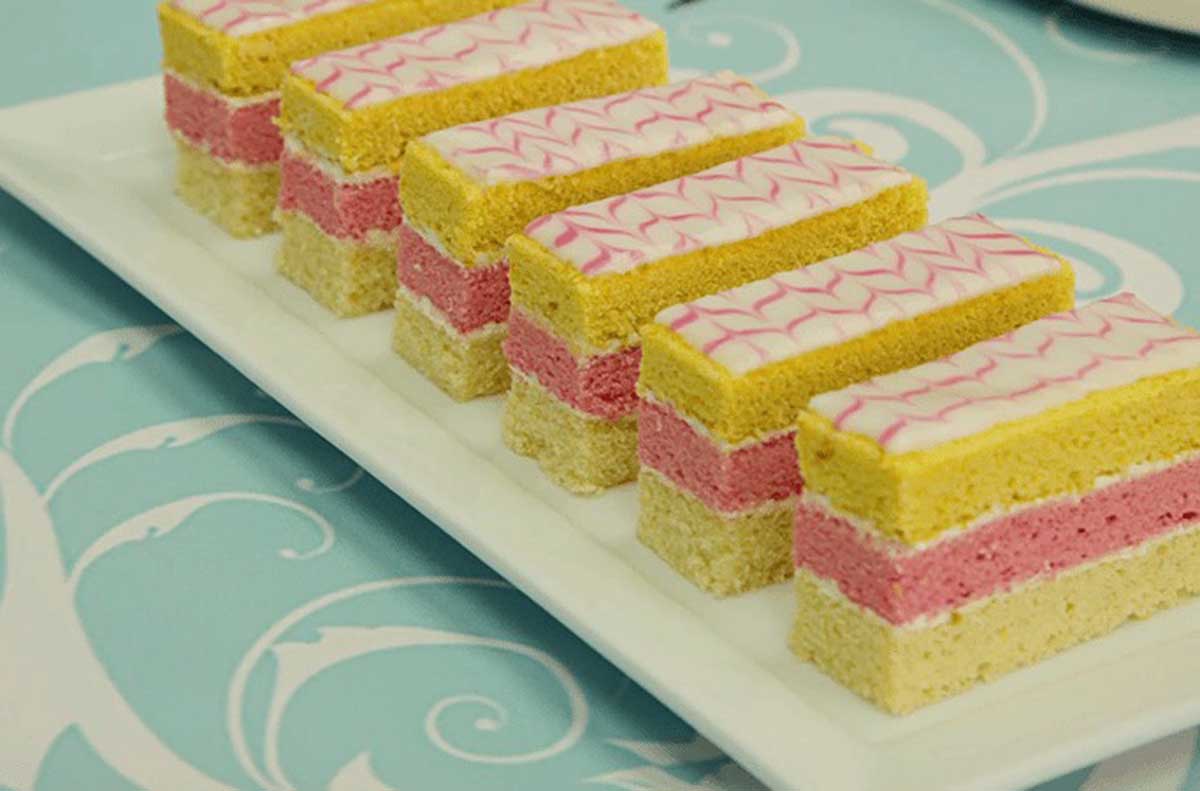


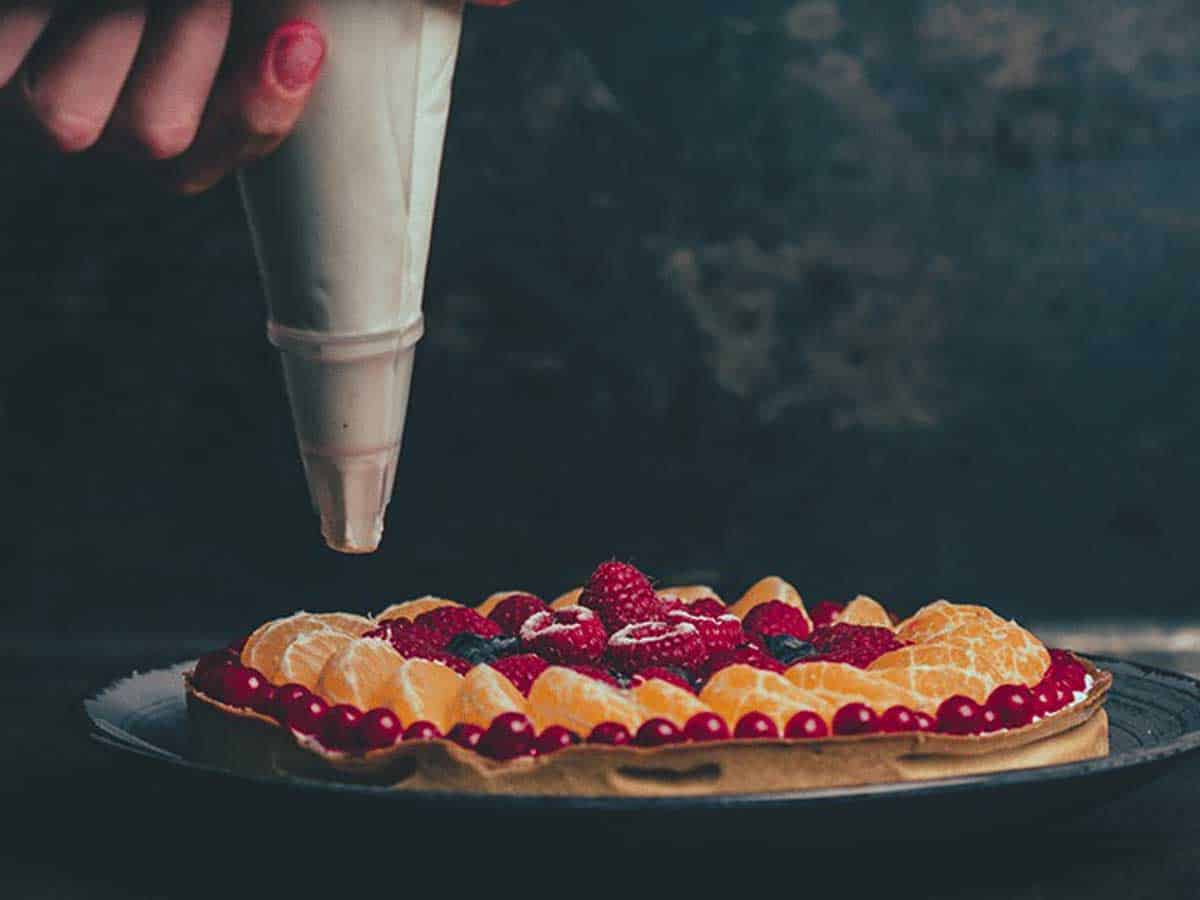
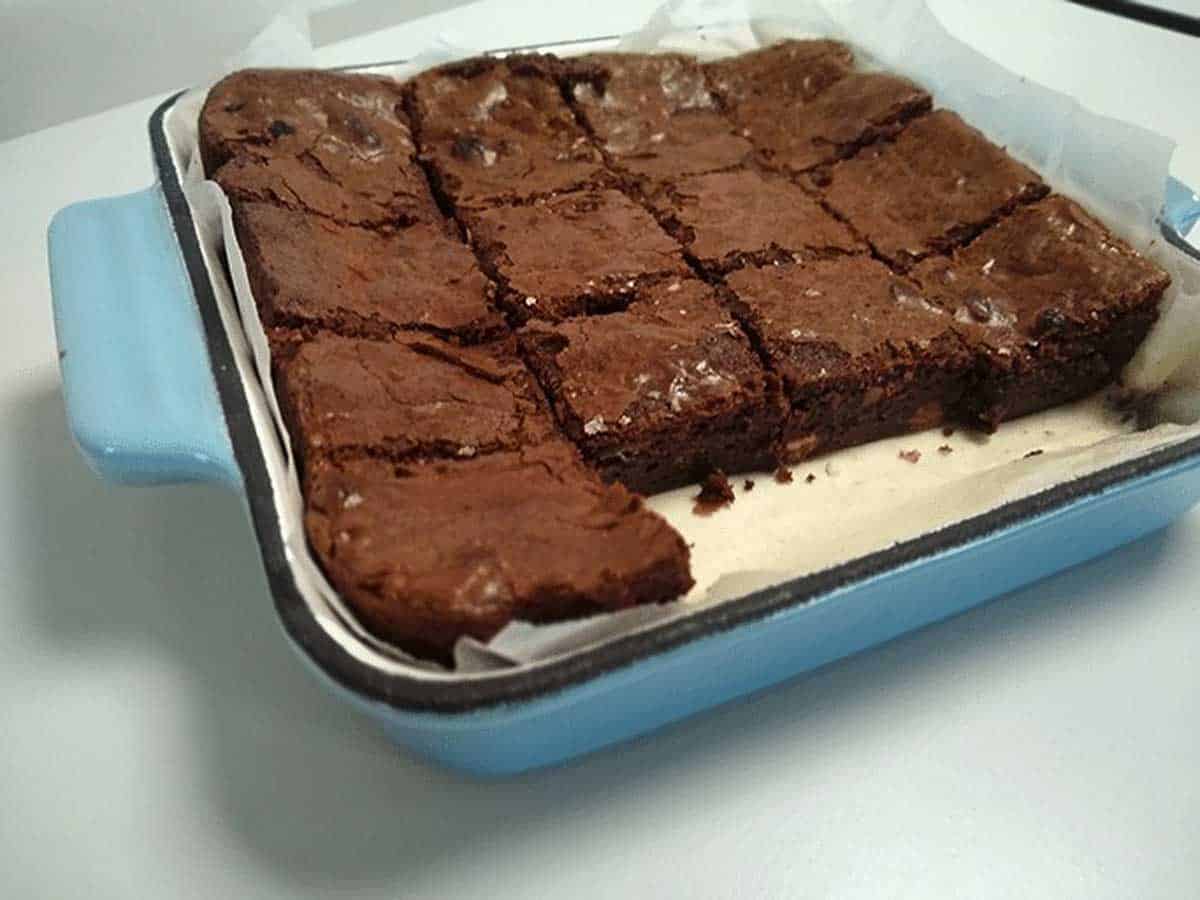